Translate

Wednesday, August 31, 2016

Making crabapple butter and jelly


I have a large crabapple tree in my yard that can yield up to 70 pounds of ripe crab apples.  I try to use as much of the fruit as I can to make crabapple butter and jelly.  It is tasty stuff, and I often sell jars of it to my airbnb guests.

I begin by laying out a large tarp under the tree and then shake the branches vigorously using a long extendable pole with a hook on the end:

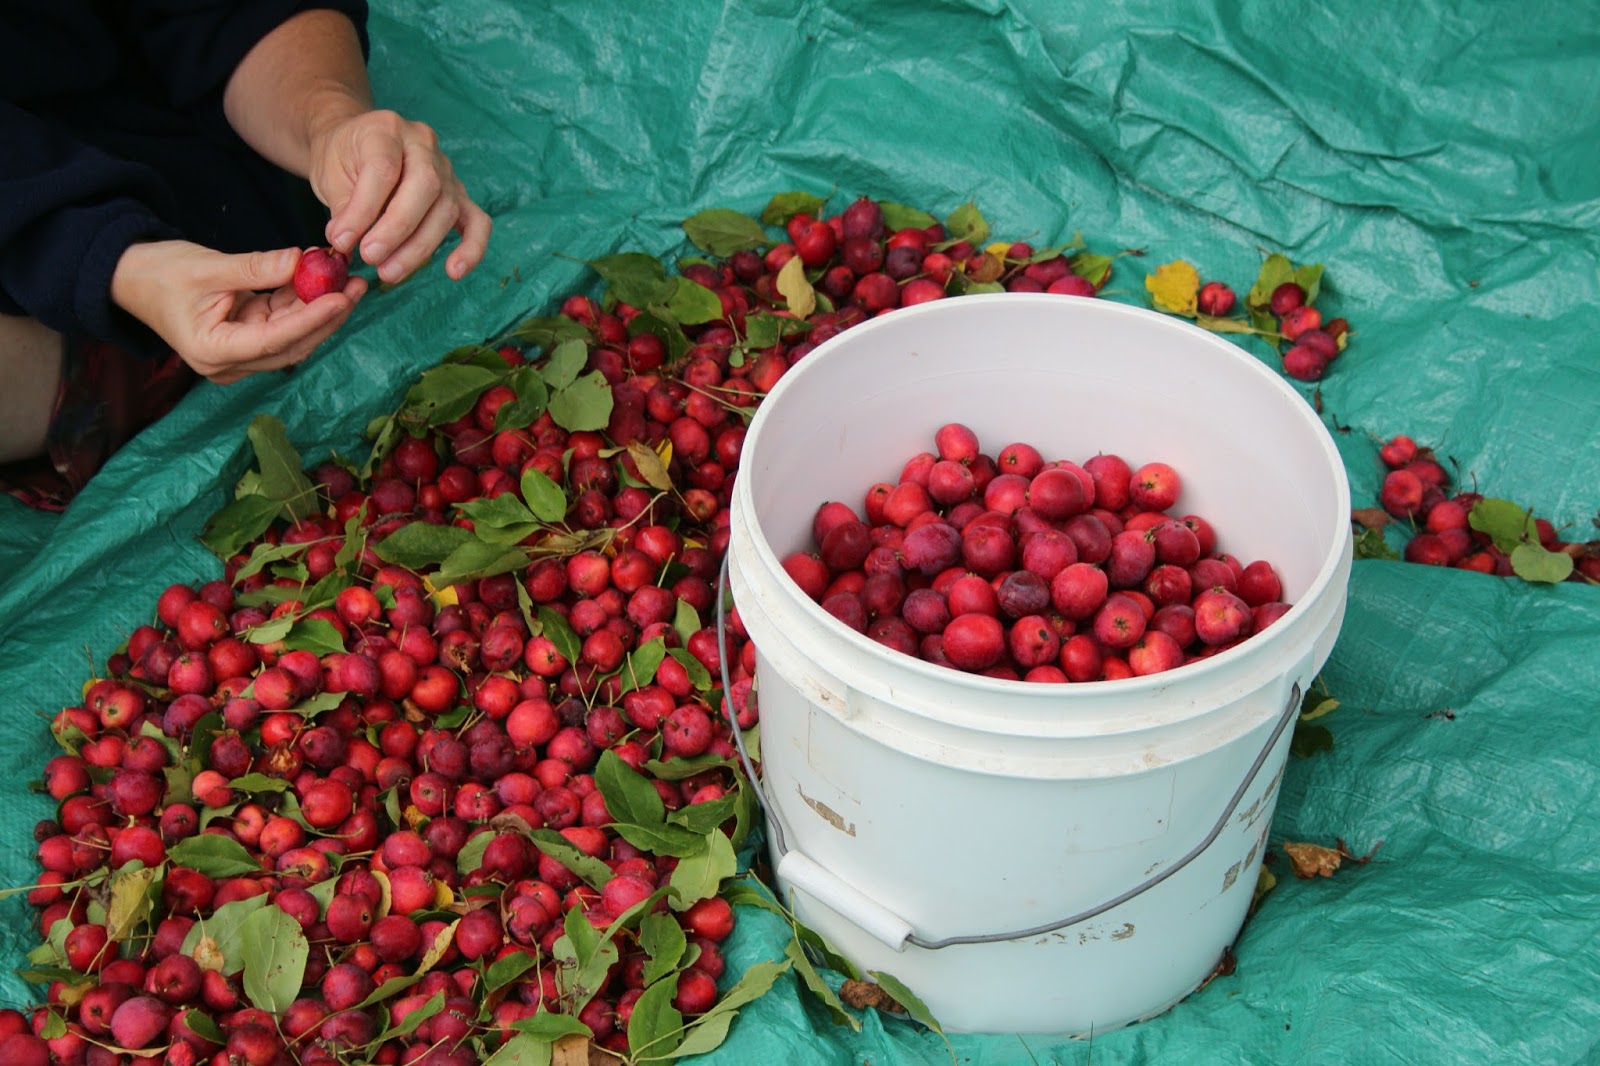
Then comes the process of sorting the good fruit from damaged or bug infested apples, here is my friend Alison helping me with that step:

This results in a bucket filled with good clean, ripe crabapples weighing up to 20 pounds:

In the kitchen I weigh out around 10 pounds of crabapples and cut the ends off each one and boil them in a large pot until they are mushy.  If I am making crabapple butter, the mush is strained through a press to eliminate seeds and skins etc.  Or, if I am making jelly, I dump it into a cheesecloth lined strainer to drain the juices out overnight:
The resulting juice or clarified mash is then boiled in a pot with an equal amount of sugar and additional spices like cinnamon, thyme, allspice etc.  I use raw sugar rather than refined white sugar:
Since crabapples have a fair amount of pectin in them, there is no need to add it in order to get the jelly or jam to set up.

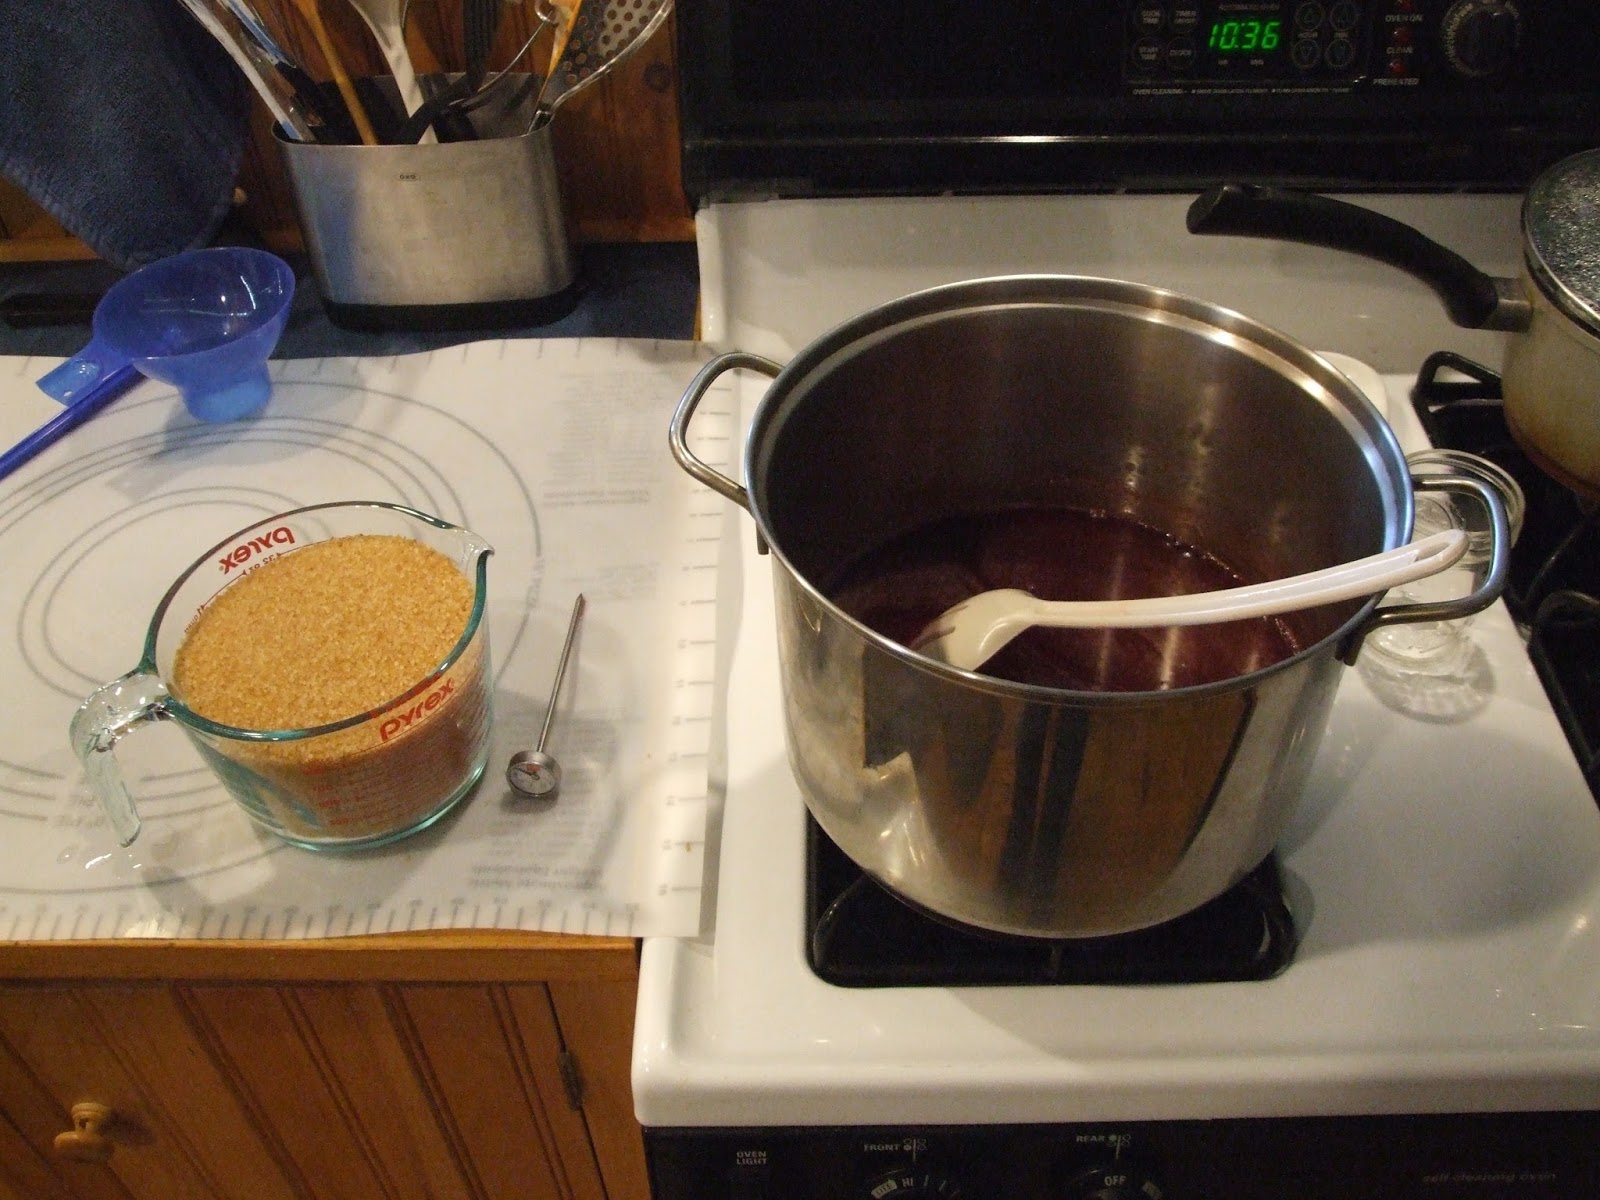
The final step is canning in which the hot juice is poured into sterilized glass jars and set aside to cool:
10 pounds of crab apples will yield a dozen or so jars of butter, or eight or nine jars of jelly:
The whole process can take over six hours from shaking the tree to finished jam, but it's worth it!  I am often complimented on how tasty my jams and jellies are.

I try to make best use of all the natural resources available on my property.  My raised vegetable beds have yielded a good crop of sugar snap peas, cherry tomatoes, basil, rhubarb, and some other herbs and spices.  I also use responsible forestry management techniques to harvest trees from the woods behind my house for firewood to heat my workshop. (here is my blog post about that)


Friday, July 15, 2016

Roof mounted solar panels cool inside the building

I was looking up at my solar panels on a very hot sunny day recently.  I noticed that they were shading the roof and wondered if they were having a cooling effect and thus reducing the air-conditioning load in my office below.  So I set up 4 temperature sensors connected to my data logger to look at a days worth of data on a clear sunny day when the ambient temperatures peaked at around 100°F in the shade.
Click image to enlarge
As you can see, the shaded roof temperature averaged about 10°F cooler than the exposed roof.  I expected the solar panel surface temperature to be significantly hotter, but it was only about 10°F above ambient.  I'm not certain that my methodology was perfect.  All I did was tape a sensor onto the back of the solar panel and secure the others to the roof with duct tape.  The ambient temperature sensor was in the shade away from the roof.

The take away here is that solar panels do have a cooling effect when covering an asphalt roof.  This is clearly an advantage when the rooms below that roof require air conditioning in the summer.

Another way to reduce air conditioning costs is to install a solar powered ventilation fan in the attic.
I installed a SunRise Solar Attic Fan many years ago and it reduced my attic temperature by up to 60°F.  These clever designs use a 10 W solar panel directly connected to a fan.  You can add a thermostat to ensure that it is not running when the attic is cool.

So one can definitely say that solar panels are cool!


Wednesday, July 13, 2016

Treating bug itch with technology

In my previous post, I reviewed small plug-in bug zappers that work very well at eliminating those few mosquitoes that get into my home.  Nonetheless, I get bitten fairly often while outside enjoying the beautiful Maine summers.  Years ago I read about a simple no-cost treatment for the itch and swelling of bug bites - you simply run the affected area under very hot water for as long as you can stand it.  Apparently this changes the composition of the histamine chemistry in your body.  I have used this technique for years and it is extremely effective at removing the itch and swelling almost immediately.  The only problem is when I get bit on a part of my body that doesn't lend itself to being placed under a faucet.

The solution is to use a device that can concentrate localized heat right on the bite.  It turns out there are a number of products on the market that do just that.  The Therapik Mosquito Bite Reliever is a small, affordable battery-powered device that works extremely well in my experience.  (Click here to purchase on Amazon - As an Amazon Associate I earn from qualifying purchases.)
Therapik Mosquito Bite Reliever
This cool (hot!) device looks like a weapon from Star Trek the TV series.  One simply holds the red circle against the bite while holding down the button.  
A bright light comes on inside that quickly heats up the affected area.  The suggested hold time is around 20 to 30 seconds or to the point where the pain becomes unpleasant.  Some people make the mistake of turning off/removing the device as soon as they feel some heat which is typically within five seconds or so.  But it is important to maintain a connection long enough that the affected area is thoroughly heated up to the point of discomfort.
applying heat for 20 seconds or so
The Therapik operates from a single 9 V battery that seems to last a long time.


I read a German clinical study of a similar (but more expensive) product in which they concluded: "Locally administered, concentrated heat, which was recognized by the patients as a very short and targeted induction of almost painful high temperature on the skin, led to a fast improvement of ... swelling, pruritus (itching), and pain ... symptoms.  Compared with alternatives of pruritus and pain treatment after insect bites/stings, (it) seems to be the fastest treatment option already available."

I could not agree more.  So yes, this product (and ones like it) are the real deal.

Eliminating mosquitozzzzz in the home

Every now and then a male mosquito will find its way through my window screens or front door and into my home.  Of course that sound is extremely annoying, but it's the females that don't make so much sound that I also worry about because of the diseases they can carry.  Over the years, I have experimented with a variety of solutions and currently use a large 40 Watt zapper (Flow Tron BK-15D) that I run on a timer at night out in the backyard.  While it is very effective at reducing the outdoor population, some do get inside.  I had been using a smaller AC powered one in my front hallway that zaps them before they can get too far.  The only drawback to that relatively large zapper was the sound it makes inside the home. While the occasional ZAP was gratifying, it could often be annoying.  Unfortunately, that unit failed recently so I started researching other options.

What I found is that there are a number of simple, small, ultra-low power devices that plug into an electric outlet and consume a minuscule amount of power while solving the problem handily.  This model is no longer available, but similar ones are available.  (Click here to purchase on Amazon - As an Amazon Associate I earn from qualifying purchases.)
Zapper with 100% recyclable cardboard packaging
I was particularly impressed that the product is packaged in a simple recyclable cardboard box.  The only instructions are on the back and were clearly translated from another language with such amusing lines as: "LED lights glow to attract mosquitoes: stimulate airs, emit violet light to attract mosquitoes into the hood."

When plugged in, 2 small ultraviolet LEDs come on to attract bugs to the electrode grid inside where they die a quick and quiet death.  No loud zapping!  This subtle purple light can also serve as a modest nightlight.
works as a nightlight
The Manufacturer suggests you to take it apart (three screws on the back) and clean up the electrodes when they catch a lot of bugs.  Here's what it looks like inside.
Remove three screws to open it up for cleaning.
I ran some electrical tests on the device to see how much power it consumes and found that it draws 3.2 mA (3.8 W).  This means that it will only add about 27 cents to your monthly bill (assuming 10 cents/kWh).  So for the energy conscious, this is not a big concern.  

I also tested it by inserting a screwdriver (holding the insulated handle carefully) to short out the electric grid and it did produce some substantial sparks.  For this reason it would be wise to keep this away from young children.

To give the device a rigorous test, I plugged it into an outside outlet for a couple of nights and it caught quite a number of bugs.
bug catch after two nights outdoors - click image to enlarge
I have deployed these clever devices in my kitchen, living room, and bedroom and I am confident they will catch the occasional mosquito that gets into my home.  I also find them to serve as a pleasant night light. 

As someone who designs electronic products for living, I would be very proud of this design.

There are quite a variety of similar devices on the market, including a very clever version that screws into a lamp socket and incorporates an LED light. (Click here to purchase on Amazon - As an Amazon Associate I earn from qualifying purchases.)
Mosquito Light Bulb Bug Zapper
I did not have a suitable location in my home for this type of lamp, but would seriously consider it for laundry/utility rooms and basements etc.  Apparently the bug zapper remains on when the LED light is off consuming around 3 W, while the LED lamp uses around 10 W.  These devices seem to get very good reviews on Amazon and there are many very good deals on them if you look carefully.

I don't think these devices should be confused with heavy-duty bug zappers.  They are really designed for the occasional incursion so should not be used in the same way as a larger zapper.  I would definitely not recommend them for outdoor spaces other than small screened in porches.

Once you do get bit, there is an amazing techno fix that cures the itch and pain almost immediately.  See my next blog post for a review of The Therapik Mosquito Bite Reliever


Saturday, July 9, 2016

Calculating energy cost of lamps and appliances

Conserving energy benefits the planet, while also conserving costs.  With this in mind it is helpful to be able to calculate how much money one saves by replacing an inefficient appliance or lamp with an energy efficient one.  For this example we will look at replacing an old 100 Watt incandescent lamp (which are being phased out around the world) with an equivalent 13Watt 800 Lumen CFL (Compact Florescent Lamp) and another equivalent brightness 10W LED lamp.

First, let's review the three salient electrical properties we are looking at here.  Volts which for the sake of this discussion is the available Voltage at a standard electrical outlet in the US which is 120 V.  Amps is the amount of current, and Watts is the product of Volts and Amps (W = V x A).


13W 800 Lumen CFL
In order to calculate cost, we first need to figure out how much power we will be billed for on a monthly basis.  Electrical power is billed by the kilowatt hour (kWh) which means 1000 W per hour.  Or another way of looking at this would be the equivalent of a 1000 W heater turned on for one hour.  The average cost per kWh in the US is approximately $.10, however that rate varies significantly from state to state and region to region.  Here in Maine we are paying approximately $.15/kWh.  It is also worth noting that the percentage of renewable energy sourced electricity varies significantly.  In New England we have the RGGI (Regional Green house Gas Initiative) that mandates a minimum amount of renewably sourced electrical power.  In Maine about 30% or our power is renewable sourced much of which comes from Canadian hydro, with the remainder sourced from biomass, wind, and solar in-state.

So let's start with an old-fashioned 100 W light bulb and assume that it is on in your living room for 6 hours a day.  To calculate how many Watt hours (Wh) are used per day we simply multiply:

100 Watts X 6 hours = 600 Wh

Which can be expressed as .6 kWh
Since we are billed by the month, we can multiply this by 30 to determine how many kilowatt hours per month we will be billed for:

.6kWh X 30days = 18kWh/month

To determine our monthly cost for this lightbulb, we simply multiply by the electric rate, so let's assume the US average of $.10:

18kWh X $.10 = $1.80/month

That doesn't look too bad does it?  But if you run the math for an energy efficient compact fluorescent lamp you get the following:

13W X 6hrs = 78Wh

.078kWh X 30 days = 2.34kWh/month

2.34kWh X $.10 = $.23/month

So by replacing that old style lamp with a compact fluorescent you would be saving $1.57 every month while also reducing fossil fuel emissions required to generate power for this electricity.  If you do the math for a 10 W LED lamp it comes out at $.18 per month with a net savings of $1.62 every month.  These lamps are so inexpensive now that you will recoup the investment within 5 months and since LED lamps last significantly longer than incandescent lamps it is a gift that keeps giving both to your wallet and to the planet.  Also, LED lamps contain no mercury.
9.99W 800 Lumen LED lamp
If like me, you have been using CFLs for years and are now in the process of upgrading to slightly more efficient LED lamps, please be sure to recycle the CFLs responsibly since they contain an average of about 4mg of mercury.  Lowe's stores have bins where you can return CFL's and also rechargeable batteries and plastic bags right next to their returns counter.
Recycling bins at Lowe's - next ro returns counter
So next time you go shopping for any electrical device from a lightbulb to an appliance.  You should start by looking at the label on the appliance you are replacing to see how much power it uses and do the math to figure out what it is costing you now and how much energy the new one will save.  If the nameplate on your appliance only shows the power in Amps, then just multiply it by 120 V to get Watts.  

Newer appliances are often more efficient.  For instance, it is generally assumed that if your refrigerator was made before 2000 that newer ones will be significantly more efficient.  So you will not only be saving money, you will also be doing the planet a favor by reducing CO2 emissions from the fossil fuels used to generate electricity.

Friday, June 17, 2016

A real-time energy display for my solar power system

http://www.mpja.com/Digital-Panel-Meters/products/52/

Ever since one of my electronic parts suppliers (MPJA) got in a line of cool blue digital meters, I have been applying them everywhere.  See my recent blog posts describing the gauge I added to my solar charged electric lawnmower, and temperature gauges that I added to my solar hot water heating system.

When I give a tour of my renewable energy systems, I point to the circuit breaker panel where the 240 V AC comes in from the roof mounted solar array and feeds out to the main breaker panel.  

Breaker panel, new meter (circled) and Envoy
Next to it (the white oval device) is the Envoy web Gateway for the Enphase microinverters on the roof.  

Envoy Enlighten live web portal
The Envoy allows real-time monitoring of every solar panel and creates a live web portal (that I embedded in my web site) showing performance of each panel and how many watts it is producing right now and over time.  The problem is that the Envoy only shows total wattage in a small hard to read small display, along with a few other statistics like the number of microinverters reporting and the total megawatt hours produced. 

What I needed was something that can be seen easily that shows the amount of power my array is producing in real time.  So I installed a multifunction meter (circled in the image above) that displays  Volts, Amps Watts, and kWH on a clean brightly lit display:
Now it is easy for me to tell people as I show them my system that it is currently generating 4497 Watts, and if a cloud goes by one can see the numbers changing dynamically.  The number at bottom right shows kWh since the meter was last reset (= 1.6MWh).  My system generally produces between 4 and 5 MWh per year.  As a geek, I have to admit that I am a sucker for a sexy blue techno glow display!

Tuesday, June 14, 2016

A new meter for my solar charged electric lawnmower conversion

Okay, so I am a geek!  11 years ago, I converted an old gasoline lawnmower to electric by replacing the gas engine with an electric motor and a deep cycle 12 V battery that I charge from solar panels.  I wrote a detailed blog about the construction of this mower and many other people have built their own.  While commercial cordless lawnmowers exist, they are relatively expensive, plus it is much more fun to build your own.


The original design included a voltmeter, amp meter, charging jack and circuit breaker power switch mounted near the handles.  The meters are standard automobile components, but they were unreliable and the Amp meter would get stuck often and I never really bothered to look at it very much.

An electronics parts supplier I use a lot (MPJA) has been getting in a line of digital meters that can display multiple properties and I decided to replace the old meters with a meter that can display Volts, Watts,  Amps and Watt hours.  At a cost of around $18, I consider this sexy meter a real bargain.  Click here to get a copy of the manual. 

 The image above shows the meter installed with the motor running before I took the mower for its first major test drive.  So with the blade spinning, it is drawing about 140 W and as I mowed into the taller grass, that peaked at around 250 W.

It took an hour or so to reconfigure the mower wiring to make it compatible with the meter and its current sensing shunt. 

After mowing a section of lawn for 10 minutes or so, the screen above shows that I used 34 Watt hours and the battery voltage slumped below 12 V on my brand-new deep cycle AGM battery.  This is the first time I have been able to quantify how much energy the mower actually uses!  I was watching the Amp numbers ranging from 12.5 to 20 while mowing (or about 150 to 250 Watts).


When I plugged it into the 40 W solar panel mounted to the roof of my garden shed, the voltage came back up to 12.56.  The battery is usually topped off in five or six hours of good sunlight.  Note that the display has a cool blue "techno glow" back light - not something that is very useful for device used mostly outdoors in bright light, but it sure is pretty.  I installed a power switch to the left of the meter to prevent it from draining the battery between uses.  The meter only uses about 2.8mA though, so I could just leave it on.  

6 week later
I recorded the Watt Hours (Wh) for each time I used the mower and found that I am ranging from 28 to 53Wh each time depending on how much area and how tall the grass is.  This is not a lot of power - and of course it's all free from the sun.  I also burn a lot of calories pushing this Beast around!


Thursday, June 9, 2016

Solar powered motion sensing yard lights


I live in rural Maine where there aren't any streetlights and on a dark moonless night it can be hard to navigate from my parking area to the front porch.  Recently, I purchased a set of four motion sensing solar powered yard lights that I am very pleased with.  The ones I purchased were made by URPOWER, but there seem to be many manufacturers of nearly identical products that range in price from around $10-$15 each.

These clever lights require only minimal solar exposure during the day to charge up their internal battery.  And like exterior floodlights that come on with a motion sensor, these ones do the same thing but only come on for 30 seconds.  They respond to someone moving from up to 16 feet away and provide a good bright light.  This clever strategy allows these lights to be very efficient while creating a large pool of light.
I have two that are sufficient to light my front porch steps and others placed around the yard to help people unfamiliar with my property to navigate from the parking area to the porch.  I consider these relatively inexpensive lights to be a very good investment and so far they have survived six months through a Maine winter which is a testament to their hardiness.  They get excellent reviews on Amazon.

If you have an area in your yard that needs lighting, but you don't want to go to the great expense of pulling AC wiring, then this may be an optimal solution that is extremely effective.

Wednesday, June 8, 2016

The benefits of a rain barrel

Rain barrel on the corner of my front porch
with raised vegetable beds visible in the background
and Envoirocycle composter on the right
Over 10 years ago, I installed a rain barrel on my front porch that catches rain from hundreds of square feet of roof on my house and front porch.  While commercial barrels are available, I found that the nearby rural feed store sells used plastic 50 gallon fertilizer barrels for about $15.  All I had to do was paint it a dark color to prevent algae from growing inside and put an opaque cover on top that lets water in.  I added a hose bib at the bottom and an overflow pipe near the top that drains out into the garden. 
hose bib at bottom of tank
It was a simple matter to modify downspout with an angled section that can be reversed to divert water away from the barrel as needed.  Due to my large roof surface area, it only takes a few tenths of an inch of rain to fill the 50 gallon barrel.  I sited the barrel up on my porch in order to have it high enough to drain well into the garden.

From an energy efficiency and sustainability perspective, this reduces the electrical usage of my 1500 Watt well pump.  In a dry summer I can go through hundreds of gallons to water my vegetable beds and flower gardens.  I don't worry too much about the lawn which is mostly weeds that I just cut down as I am less concerned with appearances than I am functionality.  In my small raised vegetable beds, I grow rhubarb, strawberries, basil, chives, nasturtium, sugar snap peas, cherry tomatoes, and some occasional herbs.


Monday, June 6, 2016

Solar water heater dashboard upgrade

 When I installed solar collectors for heating the hot water in my house back in 2006, I decided to add a small "dashboard" in the kitchen to monitor the temperatures.  Since I am an electrical engineer, I was able to cobble together a device that displays collector temperature, storage tank temperature, and a green light to indicate when the circulation pump is running.  A red LED indicates low antifreeze fluid in the collector overflow  tank.
Original solar dashboard

 There is more detailed information about the construction of this dashboard on this page of my website: http://www.arttec.net/SolarDHW/10_Dashboard/index.htm
Basically, it uses digital volt meters with LM34 temperature probes that produce a voltage that directly correlates with temperature so that 78.1° is represented by .781 V.

 Over the years I have grown accustomed to looking at this dashboard to confirm that the system is working, and also to decide when to take a shower, run the dishwasher or clothes washing loads by looking at the storage tank temperature and seeing when it has peaked during the day.  The only drawback is the displays did not include a back light and sometimes were hard to read in the evening and nighttime.

I recently came across a new temperature meter designed for monitoring heat exchangers in high-end gaming computers. They are much more attractive, include a back light and use standard 10K thermistors as temperature sensors so I ordered a few to see if I could adapt them.
Temperature meter for heat exchangers
 These meters are available from MPJA (click the image above for details) and also on eBay for under five dollars.


When I received them, the first thing I did was cut off the computer power connectors and connected 5 VDC from a wall power supply to the red and black wires.
Removed computer power connector

 Then I cut off the temperature sensor and replaced it with a standard 10K thermistor that I sell as an accessory for the solar temperature controller products I manufacture (ART TEC Solar).
Original sensor above and standard 10K thermistor below
 I used an 8 conductor CAT-5 computer cable for the wire run down to my solar heating equipment in the basement.  I used two wires each for the sensors, and two wires each for the LED status monitors.

 I mounted the 2 meters in a standard plastic box and mounted it to the window frame above my kitchen sink in place of the original dashboard.  I find these meters much more attractive and they are easier to read day and night.
Updated solar dashboard
 Here is a larger view of the meter next to my kitchen window, right above the sink:
 I am quite pleased with the more contemporary styling of this new dashboard.