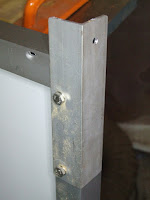
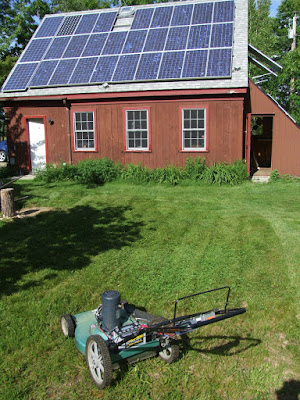
I purchased an Enphase M250 microinverter (pictured in the image above mounted to the back of the solar panel) and then bolted some angle brackets to the panel to create a wall mounting system. I gave a great deal of thought on how to install this panel safely and called in my friends and neighbor to help install it. Thanks to my careful planning the installation took less than an hour and went like clockwork.
We got 2 very long ladders up and then mounted 4 brackets I had made to the wall. I made a wooden jig that to ensure they were spaced correctly. Then we hauled the panel up by dropping a rope from the attic window and secured the top of the panel with two bolts. We were able to push the bottom edge of the panel out from the second floor bedroom window with a long board that I notched at the end for the purpose. This made it easier for the two guys on the ladder to bolt on the struts that hold the panel out at an angle of around 39° from the wall. I chose this angle to optimize winter performance (we are at 44° latitude here in Maine).
Before the installation, I had pulled some 14/3 Romex from a junction box in the attic down to the breaker box in the basement. I added a 15 amp 240 V dual breaker for the solar panel. The following morning at around 10:30 I clipped my Amp meter onto one of the wires and got a reading of .688 A on one of the lines - so that's 144 W.

According
to calculations using the online PVWatts calculator the annual energy
value for this panel will be $42 a year. So this panel will pay for
itself in less than eight years by reducing my electric bill by around $2 to $5 a month. Another way of looking at it is that each month this panel will provide enough energy to drive my Chevy Volt electric vehicle roughly 30-70 miles depending on the time of year.
My costs were relatively minimal:
$100 Schuco MPE 245 solar panel
$144 Enphase M250 micro inverter
$29 Enphase Engage cable
$20 Enphase M215 branch Terminator
$20 30ft 14/3 Romex wire (run to the breaker box)
$313 TOTAL
The other advantage of installing this panel above my bedroom windows is that it will provide shade during the summer. I do use a small window air conditioner occasionally in July and August and this should reduce the need to use that a little.
Many thanks to my neighbors and friends who are all energy mavens:
John Rogers, experienced home builder and fine furniture maker.
Topher Belknap, home energy auditor and building efficiency expert.
Al Heath, experienced home builder and energy auditor.
We all had a lot of fun installing this panel and I could not have done this without their help.
I did want some way to monitor power output and decided to install a small energy meter above the circuit breaker box in the basement. This meter only costs $25 (available from MPJA) and I mounted it in a plastic box for another $10 or so.
It shows instantaneous Watts on the lower left corner and cumulative Watt hours on the lower right corner. I plan to log the kilowatt hours weekly so that I can track performance of this single panel. If anything should go wrong, I would certainly notice a lack of performance by the end of the week. Here's a photo of it mounted above my circuit breaker box
My costs were relatively minimal:
$100 Schuco MPE 245 solar panel
$144 Enphase M250 micro inverter
$29 Enphase Engage cable
$20 Enphase M215 branch Terminator
$20 30ft 14/3 Romex wire (run to the breaker box)
$313 TOTAL
The other advantage of installing this panel above my bedroom windows is that it will provide shade during the summer. I do use a small window air conditioner occasionally in July and August and this should reduce the need to use that a little.
Many thanks to my neighbors and friends who are all energy mavens:
John Rogers, experienced home builder and fine furniture maker.
Topher Belknap, home energy auditor and building efficiency expert.
Al Heath, experienced home builder and energy auditor.
We all had a lot of fun installing this panel and I could not have done this without their help.
Update a week later
It shows instantaneous Watts on the lower left corner and cumulative Watt hours on the lower right corner. I plan to log the kilowatt hours weekly so that I can track performance of this single panel. If anything should go wrong, I would certainly notice a lack of performance by the end of the week. Here's a photo of it mounted above my circuit breaker box


