Translate

Showing posts sorted by relevance for query panel. Sort by date Show all posts

Wednesday, October 19, 2016

Installing a 245 W solar panel on my house

The solar array I have installed on my barn workshop currently consists of 31 solar panels all using Enphase micro-inverters.  The original batch of panels were only 175 W and cost me over $4/Watt in 2009, solar panel prices are now down to around $.50/watt.  I have been eyeing a spot on the south facing wall of my house for years and when my friend Paul Kando generously offered to sell me a 245 W Schuco solar panel that he did not need for $100, I jumped at the chance.  Paul has been involved in renewable energy since the 1970s and is very active raising consciousness about renewable energy here in Maine.


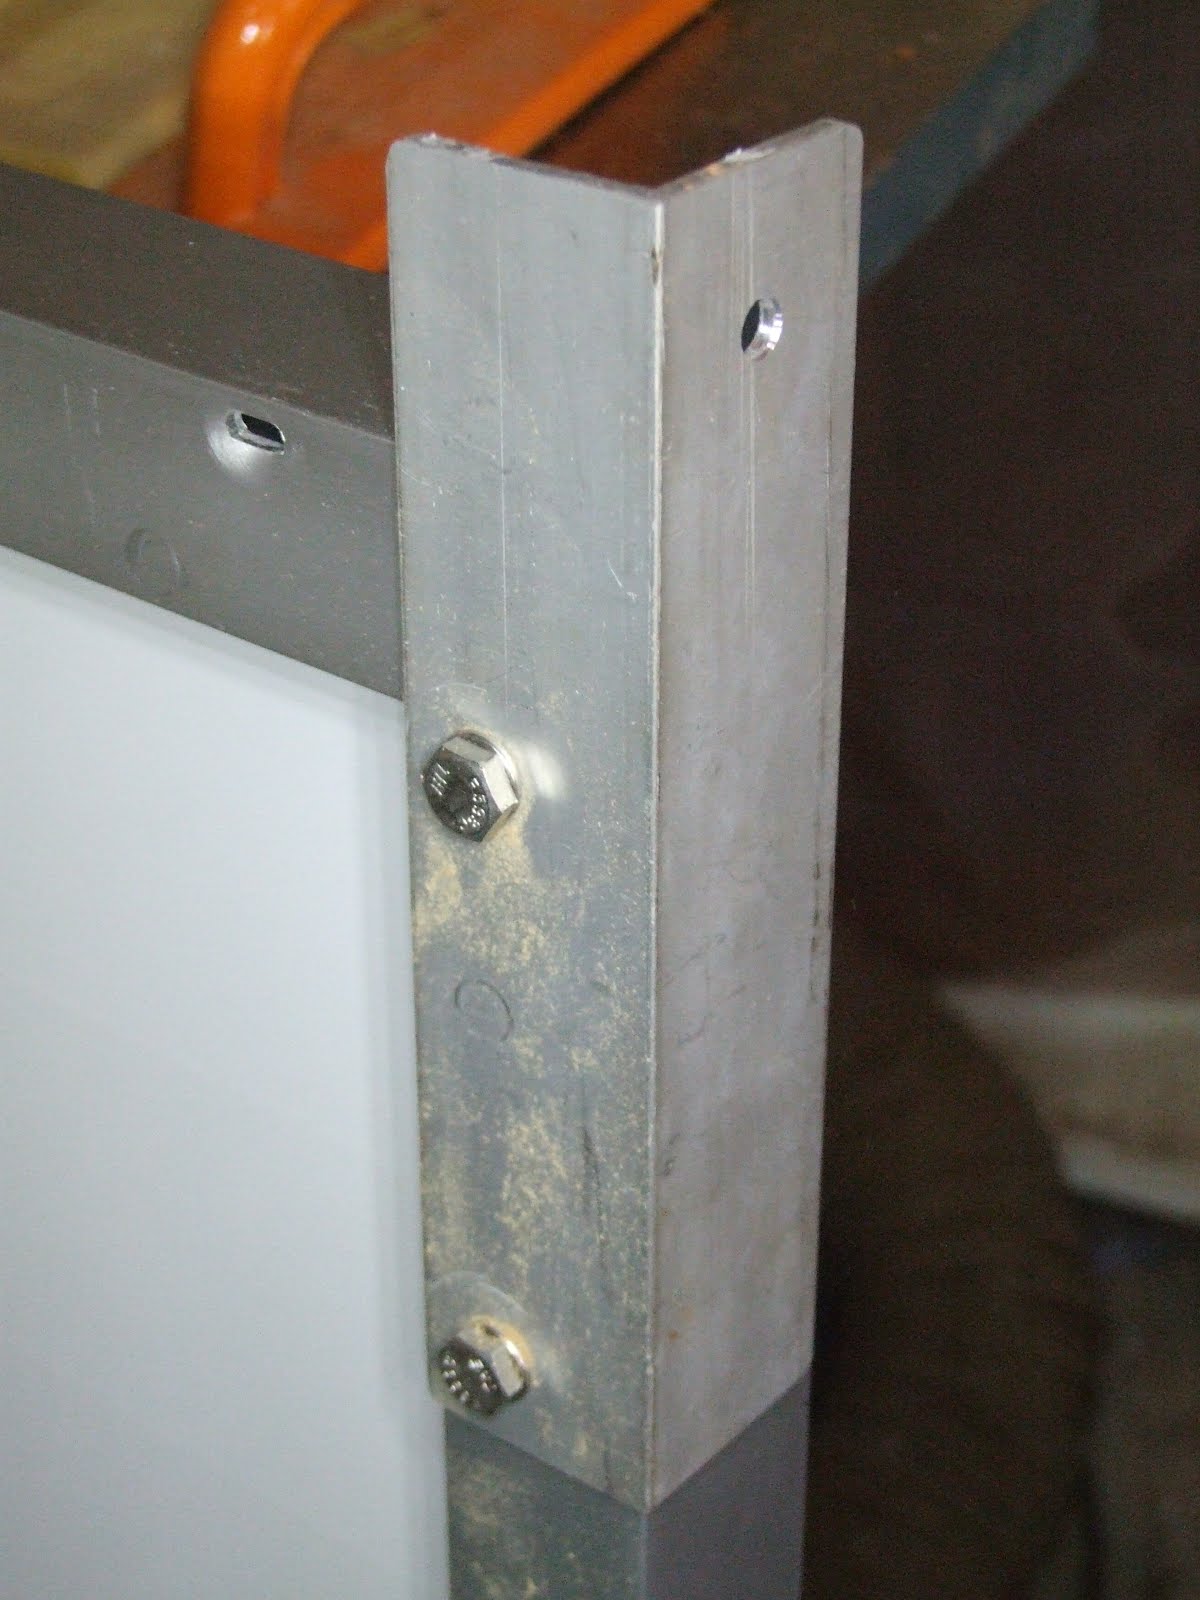
I purchased an Enphase M250 microinverter (pictured in the image above mounted to the back of the solar panel) and then bolted some angle brackets to the panel to create a wall mounting system.  I gave a great deal of thought on how to install this panel safely and called in my friends and neighbor to help install it.  Thanks to my careful planning the installation took less than an hour and went like clockwork.


ioBridge Widget
We got 2 very long ladders up and then mounted 4 brackets I had made to the wall.  I made a wooden jig that to ensure they were spaced correctly.  Then we hauled the panel up by dropping a rope from the attic window and secured the top of the panel with two bolts.  We were able to push the bottom edge of the panel out from the second floor bedroom window with a long board that I notched at the end for the purpose.  This made it easier for the two guys on the ladder to bolt on the struts that hold the panel out at an angle of around 39° from the wall.  I chose this angle to optimize winter performance (we are at 44° latitude here in Maine).

Before the installation, I had pulled some 14/3 Romex from a junction box in the attic down to the breaker box in the basement.  I added a 15 amp 240 V dual breaker for the solar panel.  The following morning at around 10:30 I clipped my Amp meter onto one of the wires and got a reading of .688 A on one of the lines - so that's 144 W.  
According to calculations using the online PVWatts calculator the annual energy value for this panel will be $42 a year.  So this panel will pay for itself in less than eight years by reducing my electric bill by around $2 to $5 a month.  Another way of looking at it is that each month this panel will provide enough energy to drive my Chevy Volt electric vehicle roughly 30-70 miles depending on the time of year.
 
My costs were relatively minimal:
$100 Schuco MPE 245 solar panel
$144 Enphase M250 micro inverter
$29  Enphase Engage cable
$20  Enphase M215 branch Terminator 
$20  30ft 14/3 Romex wire (run to the breaker box)
$313 TOTAL

The other advantage of installing this panel above my bedroom windows is that it will provide shade during the summer.  I do use a small window air conditioner occasionally in July and August and this should reduce the need to use that a little.

Many thanks to my neighbors and friends who are all energy mavens:
John Rogers, experienced home builder and fine furniture maker.
Topher Belknap, home energy auditor and building efficiency expert.
Al Heath, experienced home builder and energy auditor.
We all had a lot of fun installing this panel and I could not have done this without their help.


Update a week later

I did want some way to monitor power output and decided to install a small energy meter above the circuit breaker box in the basement.  This meter only costs $25 (available from MPJA) and I mounted it in a plastic box for another $10 or so.
It shows instantaneous Watts on the lower left corner and cumulative Watt hours on the lower right corner.  I plan to log the kilowatt hours weekly so that I can track performance of this single panel.  If anything should go wrong, I would certainly notice a lack of performance by the end of the week.  Here's a photo of it mounted above my circuit breaker box

Friday, June 26, 2015

Solar panel and equipment warranties

Note: this is a revised re-post from my old defunct blog

A year ago I was using the Enlighten web interface for the microinverters on my solar array and noticed immediately that one of the solar panels was dropping out at different times of the day and producing only 1 or 2 Watts.  (Microinverters convert DC from the solar panel to 240 Volts AC that feeds into the building and electric grid).  The Enlighten user interface lets me replay the energy produced by my array throughout the day showing Watts produced per panel and the brightness of each panel representing relative power output.  This system granularity is a very helpful tool and is one of the best features of using micro-inverters because you can isolate and identify issues at specific panels very readily.
screen shot of Enlighten web portal
I emailed Enphase tech support and they responded by saying that they would try uploading new software to the microinverter behind that panel.  (Doesn't it blow you away that they can do that!).  A week later the panel dropped out completely and was no longer producing any power so I called tech support and talked to very helpful person who explained that they had tried the upload and it had not worked so they had already issued a replacement microinverter.  Apparently inverters tend to fail within the 1st 2 years of operation and it is unusual for one to fail after 4+ years.

Enphase inverters have a 15 year warranty and solar panels ALL come standard with 20-25 year warranties.  Once the replacement inverter arrived, it was a relatively simple matter to shut down the array and go up on a couple of ladders with my neighbor and remove the solar panel to access the inverter.  At which point it is largely plug and play to replace and then bolt down the new inverter and solar panel.  Here is then new microinverter:

And now I am back to normal again:  
The value of my solar power system is enhanced by excellent warranties and customer service.  I hope that by sharing this experience I will allay any concerns my readers may have about their potential investment in solar energy.

Wednesday, November 5, 2025

Adding 4 solar panels on the ground

Solar arrays on my workshop

 My solar power system consists of 37 solar panels mounted on my workshop building and another 250 W panel mounted on my house facing south.  The original 30 panels were only rated at 175W when I installed them 16 years ago.  Then I added additional panels rated 2 tilting 245 W panels and 6 more 375 W.  The problem is in the last few years I have added heat pumps which draw an enormous amount of power during the winter months and my electric bill shoots up from zero (actually, $42 minimum connection fee charged by my utility for the "privilege" of being connected!) through the summer to over $300 in January and February.

With electric rates increasing dramatically I am looking at options.  In my home I'm shifting back to using a propane heater for my living room because the heat pump is unreasonably expensive to operate and in both buildings I'm using more firewood to offset the use of heat pumps and fossil fuel.

Last winter when my propane automatic standby generator failed I was without power for four days and this was unacceptable so I purchased two solar panels and a battery generator as documented in this recent post.  Then in the spring I decided to use the battery generator as a backup power supply for my 3D printers and stored the solar panels inside my workshop.  I realized this was pointless because I was literally losing money from energy these two panels were not generating.


So this October I decided to deploy those two 195W bifacial panels and add a couple more similar panels but they're not bifacial, however monocrystalline panels are much more efficient in low light.  Bifacial panels can generate up to 15% more power from the back especially when there is snow on the ground to reflect light onto the back. 

The panels are facing south and tilted up at a high angle to account for the low winter solar elevation angle. 

Panel specs 


Here's a back view showing the bifacial panels on the right.  These are all made by a company called Eco-worthy who make very high quality and very affordable panels and I bought them on Amazon.


 I made my own mounting system using aluminum L extrusions that I riveted together.  This cost me roughly $40 per panel and should hold up well.  The whole mounting system folds up flat so I can take it down and store it should I need to.  Clearly, I will need to shovel snow away from the bottom of these panels in the winter.  But that's no big deal to me.


It's fall here in Maine and the time of year where we get very strong winds so I used tent pegs to secure the bottom of the mounting brackets firmly so they won't blow over.

(in mid December we got an unusual southerly wind storm that blew them all over.  Fortunately they were not damaged and I have repaired the broken mounts and will be securing them to the ground with big screw anchors)


All of my other solar panels are connected to the grid using micro-inverters made by Enphase.  (One micro-inverter for every solar panel).  However over the last 16 years 17 of the 32 original inverters have failed.  These were first generation technology and they have been replacing the failed units under warranty with seventh generation technology, but my 15 year warranty has now expired.  My trust in that system has eroded over time and I decided to use a string inverter.  String inverters take multiple solar panels connected in series and/or parallel and convert that to 120 V AC or 240 V AC.

Series-parallel connections

I connected the panels in this configuration as shown above which is the optimal one for best energy performance and the smallest gauge power cable required to feed the solar energy to the inverter.  The inverter wants to see a DC solar input from 22 V to 65 V.  By wiring two panels in series I get approximately 44 V and then by connecting them in parallel I optimize the power delivered to the inverter


I needed a couple of Y adapters in order to connect the two pairs of panels to the main cable that feeds into the inverter. Solar power cables use MC4 connectors which snap together and form a fully weatherproof connection.   These connect to red and black 10gauge wires that go across my yard for about 15 feet where they pass through the wall and down into my basement where the inverter is.


I purchased a weatherproof cable entry cover so I can prevent weather and critters from crawling in to my house.  These are typically used on campers and boats.

Down in the basement, I was able to install the (blue) inverter right next to my breaker panel.  I used more 10 gauge wire than I needed and tucked it up in the ceiling in case I need to move the solar panels.  Power comes out of the inverter at the bottom and that power cord plugs directly into an outlet to back-feed the outlet.  (This is known as plug-in solar)

This is a G2 Series Grid Tied Inverter (model SUN-1000G2-M) that I purchased on eBay very affordably.  It is rated for 1000 W and my four solar panels can produce up to a peak of 800 W so I might add two additional panels in the future which shouldn't be a problem for this inverter.

The little blue display above the breaker panel monitors a single 245W solar panel mounted to the south wall of my house.


The inverter has a very helpful color display screen that shows power being generated and also a chart of Watts versus time. This was taken around 9:00am.


I connected this AC circuit to my Emporia energy monitor so I can see live data of the energy being generated in real time.

I did a detailed blog post about the Emporia system I installed back in 2021.  It is a very affordable system that I use to monitor 8 circuits in each of my 2 buildings.  I can track energy flowing in BOTH directions - meaning that solar power shows as "negative" energy in the charts and readings.

Friday, June 17, 2016

A real-time energy display for my solar power system

http://www.mpja.com/Digital-Panel-Meters/products/52/

Ever since one of my electronic parts suppliers (MPJA) got in a line of cool blue digital meters, I have been applying them everywhere.  See my recent blog posts describing the gauge I added to my solar charged electric lawnmower, and temperature gauges that I added to my solar hot water heating system.

When I give a tour of my renewable energy systems, I point to the circuit breaker panel where the 240 V AC comes in from the roof mounted solar array and feeds out to the main breaker panel.  

Breaker panel, new meter (circled) and Envoy
Next to it (the white oval device) is the Envoy web Gateway for the Enphase microinverters on the roof.  

Envoy Enlighten live web portal
The Envoy allows real-time monitoring of every solar panel and creates a live web portal (that I embedded in my web site) showing performance of each panel and how many watts it is producing right now and over time.  The problem is that the Envoy only shows total wattage in a small hard to read small display, along with a few other statistics like the number of microinverters reporting and the total megawatt hours produced. 

What I needed was something that can be seen easily that shows the amount of power my array is producing in real time.  So I installed a multifunction meter (circled in the image above) that displays  Volts, Amps Watts, and kWH on a clean brightly lit display:
Now it is easy for me to tell people as I show them my system that it is currently generating 4497 Watts, and if a cloud goes by one can see the numbers changing dynamically.  The number at bottom right shows kWh since the meter was last reset (= 1.6MWh).  My system generally produces between 4 and 5 MWh per year.  As a geek, I have to admit that I am a sucker for a sexy blue techno glow display!

Saturday, April 11, 2015

Solar collectors and panels explained

I am often surprised when I come across people who are unaware of the difference between a solar panel a.k.a. PV (photovoltaic) panel and a solar collector.  Both types are seen installed on sloping roofs that face south.  (They are never seen on north facing roofs in the northern hemisphere, so if you are lost and see them on a roof you can generally assume they are facing south). So for those who do not know the difference, here is a simple clarification.

http://www.greenspec.co.uk/building-design/solar-collectors/A solar collector is a device that absorbs heat from the sun which is then used directly or stored in a tank inside the home.  Collectors can be used for both building heating and domestic hot water heating.   Here is a very basic diagram showing how it works.

The principle is similar to leaving a garden hose out on your lawn on a sunny day - the water will come out warm.  Collectors are much more efficient and sophisticated version of this.

There are essentially two types of collectors.   Flat plate collectors are often confused for solar panels because they are large rectangular devices with glazing on the front.  Inside there are sheets of black metal heat absorber material coupled to copper plumbing.
http://www.greenspec.co.uk/building-design/solar-collectors/

The other type of collector is an evacuated tube collector like this:
These collectors have a heat absorber pipe inside something that is similar to a glass thermos bottle.  Heat is transferred to the plumbing manifold header at the top.  The vacuum glass tube prevents heat loss and improves efficiency.

On my property I use flat plate collectors on my house to heat water, and on my workshop building to heat the building via radiant floor and radiators.   Both systems also use small solar panels to provide electricity for the circulation pumps that pump the antifreeze fluid through the collector to the storage tank.  Due to the lower cost compared to solar electric panels, both of these systems generally have had a much shorter return on investment than solar electric systems.

Wednesday, December 22, 2021

Home electrical energy monitoring with Emporia


Click here to buy


As an energy efficiency maven, I am always interested in looking for ways to monitor my energy usage.  The more I can learn about how my energy is used the more I can figure out ways to conserve.  Over the years I have experimented with different kinds of energy monitors and just recently discovered this very affordable home electrical energy monitoring system.   

An Emporia system like the one pictured above sells for around $160.  (click here to purchase one - As an Amazon Associate I earn from qualifying purchases.
This system allows you to monitor 16 separate circuits in your circuit breaker box.  A smaller 8 circuit system sells for around $100.  I have installed two of these systems, one in my workshop that also feeds through to the house and a separate system in the main breaker panel of the house.  

They also sell smart plugs that can be controlled by your home automation system.  These also connect into the monitoring system so you can monitor energy for specific plug in items:

I have ordered one of these to check out and might use it to monitor and control my AV system via my Alexa app and Echo devices.

Having recently installed heat pumps in both buildings and also added 5 375 W panels to my solar array, I wanted to see how everything was working out.   (I was a little shocked that my first electric bill since installing the heat pumps and upgrading the solar power system came out at over $250! - but my main reason for doing this was to stop using propane for heating both buildings and I think it will come out less expensive per heating season).

Installation is surprisingly easy so long as you're comfortable opening up your breaker panel and I had absolutely no trouble getting the system working within 1/2 an hour so.  below is a picture of my main breaker panel with the Emporia system installed:
circuit breaker panel with Emporia monitoring equipment

Yes, I know, it looks messy, but it is all safe and functional.  The system includes two very large 200 Amp current transformers at the top that measure all the power coming into the building from the utility:
200 amp current transformers installed

Then multiple small current transformers clip over the wires to the circuits that you want to monitor:

small current transformers installed

These are then all plugged into the monitor device that sends signals out via Wi-Fi. There is an antenna that pokes out through the wall of the breaker box that you can see in the bottom of the image:
Emporia monitoring unit installed in the breaker box

A few minutes after installing the app, I could see real-time energy data showing up in the form of graphs and lists of circuits that I had named.  I particularly like that you can configure it to record power from your solar power system.

Below is a screenshot from my phone showing my EV charging station feeding some power to my Chevy volt to keep the battery warm.  The temperature is hovering around freezing in late December here in Maine and my car draws power in small bursts to keep it warm in the winter when it's not actually charging.  While I knew this was something that was going on, it is educational and informative to see exactly how much power and how often it is used to keep the car battery warm.  Keeping the battery warm dramatically extends its useful life.

 
This screenshot shows a weeks worth of data for my house.  Clearly, the heat pump is the biggest energy user followed by a small 1.2 kW electric heater used in my small bedroom at night (the master bedroom is heated by propane).  Solar power in this breaker panel comes from one 240 W solar panel mounted on the side of the house.
list of circuits and the energy they are using

 This screenshot shows daily solar energy produced by my entire solar array of  36 solar panels:

screenshot showing my solar energy system daily generation

And this screen shows the hourly solar output for the last couple of days:
screenshots showing hourly energy produced by my solar system

Yes, the solar days are quite short in December here in Maine!

It is said that knowledge is power, so I am feeling quite empowered by all of this useful information!   I find myself opening the app on my phone several times a day and poking around through all the information to see what I can learn.  It is particularly interesting to watch the real-time chart updating every second to see the energy cycles of things like the heat pump, well pump, solar power system and EV charging station.


Saturday, March 7, 2015

Solar panel seasonal tracking

My workshop with solar arrays
A couple of years ago after I had installed my west facing solar array, I realized there was still some space above my south facing solar collectors that are used to heat the building.  So I decided to install two additional 245W panels.  Each panel feeds an Enphase microinverter that converts the DC solar power to 240VAC that feeds into the main breaker panel.

Solar panels perform optimally when they are pointed directly at the sun and their energy output drops significantly when they are off by as much as 20°.   Since the sun elevation changes from 42° in the winter to 66° in the summer here in Maine (a change of 42°) I felt it would be wise to engineer the panels to track the seasonal changes.

I researched DC linear actuators and found one that had a 24 inch stroke, this means that it could change length from 28 inches to 52 inches.  This would allow me to lower the panel to meet the lowest sun angle in the winter and raise it relatively close to the 66° summer elevation angle.  I am more concerned with optimizing winter power since the days are so much shorter.
Progressive Automations PA-14
I used Google SketchUp to optimize the geometry of the installation.
In order to get the panels to accurately track the sun's position, I designed a servo control system (here is my schematic) and connected it to a timer that activates the electronics several times a day for a minute.  Here is a photo showing the timer mounted above my handmade control panel that allows me to operate it in automatic or manual modes.
Moving the panels in manual override
I designed a solar tracking sensor and built it into a small red plastic dome.  There are two small photocells mounted above and below a black painted metal divider.  When the sun shines unequally on the two sensors a signal is sent to my controller to move the motor until the brightness is equal on both sensors.
Sun tracking sensor with 2 photocells
It is early March now and the actuators are approaching their maximum extension in order to catch the higher angle of the sun.  Due to limitations of the length of throw of the actuators, they only actively track the sun from the fall solstice through the winter until the spring solstice.  This improves performance during the shortest solar days in the year.
Solar panels with linear actuators extended part way
To be honest, I am not sure how much more energy I am gaining by tracking the seasonal solar elevation changes, but it was a lot of fun to engineer this project.  I am reminded that this system is working because the linear actuators are loud enough that I can hear them when they move.  The timer is programmed to activate the system at noon and 2:00pm for a minute every day.


Thursday, June 8, 2017

Replacing a failed solar microinverter


A few weeks ago I checked the Enphase Enlighten web portal (see it here on my web site) that shows the real-time performance of my solar power system and noticed that the top-left solar panel was not producing power.  The numbers showing Watts per panel are updated every 10 minutes, and you can play back data from previous days/weeks etc.

So I contacted Enphase and they confirmed that the M190 microinverter had failed and authorized an RMA for a warranty replacement.  These products are warrantied for 15 years and this is the 2nd one I have replaced so far.  (Microinverters convert DC solar power to 240VAC that feeds power into the building).  I received the replacement unit a week later and asked my friend John if he could come over and help replace it, John is a retired builder and enjoys climbing around on buildings!  We borrowed my other neighbor's ladders and climbed up to the roof.


It was a relatively simple matter to replace.  First I turned off the main breaker for the array, then climbed up and covered the panel with cardboard to prevent it from generating power while disconnecting and re-connecting it.  We unbolted the panel and moved it over to access the microinverter underneath.

It was quick work to remove and replace the new one which came with detailed instructions for safely performing the procedure:

I shot a time-lapse video of the process:

Once it was installed, I had to press a button on the Envoy web interface box so it could "find" the new inverter.  

Then a quick call to Enphase so they could update the web page that shows the array performance in real time.
This was a quick and painless process, and I'm grateful for good friends/neighbors and a great warranty on the products.

For more information about the process of installing my solar array, click here to see the detailed blog.