Translate

Saturday, March 7, 2015

Solar panel seasonal tracking

My workshop with solar arrays
A couple of years ago after I had installed my west facing solar array, I realized there was still some space above my south facing solar collectors that are used to heat the building.  So I decided to install two additional 245W panels.  Each panel feeds an Enphase microinverter that converts the DC solar power to 240VAC that feeds into the main breaker panel.

Solar panels perform optimally when they are pointed directly at the sun and their energy output drops significantly when they are off by as much as 20°.   Since the sun elevation changes from 42° in the winter to 66° in the summer here in Maine (a change of 42°) I felt it would be wise to engineer the panels to track the seasonal changes.

I researched DC linear actuators and found one that had a 24 inch stroke, this means that it could change length from 28 inches to 52 inches.  This would allow me to lower the panel to meet the lowest sun angle in the winter and raise it relatively close to the 66° summer elevation angle.  I am more concerned with optimizing winter power since the days are so much shorter.
Progressive Automations PA-14
I used Google SketchUp to optimize the geometry of the installation.
In order to get the panels to accurately track the sun's position, I designed a servo control system (here is my schematic) and connected it to a timer that activates the electronics several times a day for a minute.  Here is a photo showing the timer mounted above my handmade control panel that allows me to operate it in automatic or manual modes.
Moving the panels in manual override
I designed a solar tracking sensor and built it into a small red plastic dome.  There are two small photocells mounted above and below a black painted metal divider.  When the sun shines unequally on the two sensors a signal is sent to my controller to move the motor until the brightness is equal on both sensors.
Sun tracking sensor with 2 photocells
It is early March now and the actuators are approaching their maximum extension in order to catch the higher angle of the sun.  Due to limitations of the length of throw of the actuators, they only actively track the sun from the fall solstice through the winter until the spring solstice.  This improves performance during the shortest solar days in the year.
Solar panels with linear actuators extended part way
To be honest, I am not sure how much more energy I am gaining by tracking the seasonal solar elevation changes, but it was a lot of fun to engineer this project.  I am reminded that this system is working because the linear actuators are loud enough that I can hear them when they move.  The timer is programmed to activate the system at noon and 2:00pm for a minute every day.


Thursday, March 5, 2015

Adventures in EV charging

2012 Chevy Volt

When I purchased my 2012 Chevy Volt, I was aware that it came with its own charging cable that could plug into any regular 120 V outlet, but it would take almost 9 hours to fully charge the vehicle.  Faster Level II chargers could reduce the full charge time to below 4 hours.

Since I wanted to track energy usage for charging the vehicle, I pulled some heavy wire (Romex 10/3) from a 20Amp 240V breaker out to the front of the building and installed a separate Watt meter that I found on eBay, and installed a 120V outlet below it to start with.  (I read the meter weekly and post results to a chart on my web page.)
Me installing Watt meter
With an EV range of 27 to 38 miles, I thought it would be convenient to install a 240V Level II charging station that could charge the vehicle in less than four hours so that I could make several long trips in a single day if needed.  In doing my research I found that most charging stations available sold for over $1000 and up into the several thousands not including installation.  But I found that GM was subsidizing a charging station made by Bosch called the Voltec SPX, and I purchased one for around $500.  Being an electrical engineer and DIY inclined, I installed the charging station myself.  I have learned that if you hire a contractor to do this it can cost anywhere from $300 to almost $2000 depending on how much wire they need to pull for this job.  

The installation was relatively simple:
Voltec SPX charging station and Watt meter
At the time I considered this charging station to be a piece of competent German engineering with a good balance of form and function.  The round shape allows you to hang the coiled charging cord onto it for storage and it appeared to work just fine.

The trouble began 11 months later just before the charging station went out of warranty.  It stopped working and showed a red indicator light.  So I returned it to Bosch and they sent a replacement.  When it failed again a few weeks later I decided to open it up and have a look inside.   What I found was that the engineer who had designed this charging station had installed fuses on the circuit board that were soldered into the board making them completely un-replaceable to your average consumer.  However, as an electrical engineer it was relatively simple for me to remove and replace those blown 15 amp fuses with ones rated for 20A.  The original fuses were rather conservatively rated since the Chevy Volt draws just below 15A per leg of the 240V line.   In retrospect I think that my 240V table saw creates power surges that more than likely caused these fuses to blow.   Here is a close-up of the circuit board inside the charging station:
Fuses in Voltec SPX charging station
I became quite irritated when my replacement fuses blew a few weeks later since it is a pain to open up the charger.  So I installed 2 small 20A circuit breakers on pigtails and sited them where I could reset them from the outside:
2 - 20A circuit breakers added to Voltec SPX charging station
This fix worked, and I was able to re-set the breakers every so often when they tripped.  But a few weeks ago the charger stopped working and displayed an ominous blinking red idiot light.  This time I had had it!  So I went back to charging from a 120V outlet using the Volt charger that came with the vehicle while I researched affordable options. 
Chevy Volt charger
What I found was an affordable open source EV charging station made by Electric Motor Werks Inc. in California.  These guys had developed their product with a Kickstarter campaign in July 2013 and now had a well-designed product on the market that I was able to purchase for under $500.  This clever design is based on the popular Arduino microcontroller and it contains a very basic 240V relay for transferring power to the vehicle.  It is built into a plain-vanilla sealed metal box that can be mounted indoors or outdoors.

I decided to install the charger inside and reuse the charger cable and plug from the original charging station.  Here it is installed inside behind the Watt meter:
JuiceBox charging station
I installed a small green light on the side of the box so I could tell when the charging station was providing power to my vehicle at a glance.

In addition to reusing the original coiled charging cord and plug, I also took the plug holder out of the old charging station and mounted it to the wall under my carport.  This allows me to charge and store the connector in 2 locations which is convenient.

Charge plug holder
This new setup works perfectly and I am pleased to own a piece of open source hardware that I know that I can fix or upgrade myself in the future should it be necessary.  I did require some tech support via email during the installation, and found the guys at Electric Motor Werks Inc. to be very responsive, friendly and helpful.

Here is my Volt being charged under the carport, and you can see the other charge plug storage location below and to the right of the Watt meter out front where I often charge the vehicle in good weather.  I also put a 120V outlet on the left of the meter box for the Volt Charger.
Chevy Volt charging under car port
Volt charging from JuiceBox (hidden inside building)

I hate to throw things in the garbage, so I am stripping out all of the parts that I can salvage from the original Voltec charging station including the circuit breakers I added, terminal strips, ribbon cable and even some screws.

Voltec SPX inside - mostly scrap.
Oh, did I mention that my Volt is charged from our 5.6kW solar array?  This means I am driving for free with zero carbon emissions for local driving most of the year.  More info can be found on my Chevy Volt web page.

Monday, February 23, 2015

Geeking out on thermal imaging

June 2017 update: I upgraded to the FLIR One thermal camera that plugs into my smart phone. Much better and less expensive!  http://mistersustainable.blogspot.com/2017/06/solving-mysteries-with-my-new-ir-vision.html

I am a geek and proud of it!  I enjoy using instruments to quantify physical properties and have an arsenal of electronic instruments ranging from voltmeters and oscilloscopes to data loggers, a tachometer, decibel meter, Geiger counter, light meter and Gauss meters and many more.  The most recent addition to my tool belt is a VT04 Visual IR Thermometer made by Fluke.

Fluke VT04 Visual IR Thermometer
This tool is a fraction of the cost of a thermal infrared camera at under $500 and has many features that I find more useful than the Flir brand of IR cameras.  The one feature I find most compelling is that this clever camera incorporates both an infrared imager and a regular camera and it allows you to blend those two images in various ratios.  Here is an example of the dining room windows with three different percentages of infrared overlay:
While the infrared overlay is not very high resolution, and shows as somewhat blurry compared to the professional cameras, it is perfectly sufficient for identifying cold spots inside buildings.  The temperature shown is taken from the center of the image.

The temperatures here in Maine are below 0°F outside tonight, so I used my new tool to study the exterior walls of our home from the inside looking for cold areas that indicate missing or poor insulation.

One of the first things that I suggest that people do when they start out to tighten up the heat leaks in their home is to install outlet covers to prevent cold air leaking in through the outlets in outside walls.  This is a quick inexpensive fix that can have a big effect. Here is a good example showing a normal image of an outlet with an electroluminescent nightlight blocking one outlet:
As you can see the uncovered outlet is leaking cold air and if it were covered with a plastic outlet cover this would reduce the cold air infiltration.  You can buy inexpensive kits that include gaskets and plugs to seal up these leaks.  Here's a how-to about insulating outlets.  I had already installed a foam gasket behind this outlet plate, so there is no cold air leaking around the edges, but I need to buy some more plastic plug-in covers for the actual outlets like this:

The coldest rooms in the house are the bathrooms and laundry room on the west wall. Here is a shot taken of the laundry room wall and ceiling.  The cold area indicates poor or missing insulation, and now I know exactly what needs attending to.  I will be looking into the crawl space above that part of the ceiling real soon!
Most houses do not have any insulation covering the rim joists between floors, and this may be part of the issue here.

The software that comes with the camera allows you to adjust the blend of normal vs IR after the images have been taken which can be very helpful in identifying what was in the shot.  Another feature is the ability to take time-lapse sequences automatically.  And you can set a temperature threshold so that the camera will automatically take a picture when it is exceeded.  Both are features that I have plans to use in the future.

The Fluke VT04 will see a lot of use as I work to identify heat losses and repair them!  It will also come in handy in my electronic design work so I can track overheating components.

Monday, February 16, 2015

Snow throwing

For those of you who like to read vicariously about my life in the frigid Northeast, I thought I would share what is involved in using a snow thrower.  The recent snowstorm was relatively light, but it blew some massive snowdrifts that were over 18 inches deep across our driveway that I had cleared previously.


Gearing up to go out and use the snow thrower makes me think of putting on a spacesuit.  I pull yellow waterproof slickers over my fleece lined jeansI, then put on full-length rubber boots with heavy cotton athletic hiking socks under and pull the slickers down over the boots.  Then a full-length Thinsulite insulated jacket is zipped up all the way to my chin.  Under the jacket I wear just a T-shirt and a plaid flannel shirt, any more than that and I would sweat too much and sweating is a bad idea in frigid temperatures because it makes you feel a lot colder.  I wear very thick Thinsulite insulated gloves with good rubber grips on them.  On my head I have a padded wool hat, and hearing protection that also serves to warm my ears.  (The snow thrower is quite loud).
I use a 5 hp craftsman snow thrower that incorporates all of the basic controls

There are 5 forward speeds, and 2 reverse speeds that are selected by a big lever.

a crank handle allows me to rotate the chute to direct the snow left and right.

 
The top end of the chute can be tilted to direct the snow further or closer to the thrower.

Squeezing the left handle clutches in the auger that sucks the snow into the impeller.

Squeezing the right handle engages the drive clutch.
  
Starting a snow thrower is just like starting a gasoline lawnmower.  I set the throttle to full speed, pump a little gas into the carburetor and then pull start it.  I also have the option of using an extension cord to start it electrically which can be convenient sometimes.  Like a lawnmower (or tractor) the engine runs at a constant rate set with a throttle lever, and you set a gear that is appropriate for the snow depth.  Drop it into gear and off we go!

On a day like today, the temperatures barely got up to 15°F with wind blowing at an average of 20 mph and wind chills down around 0°F in the gusts.  There are times where the fine snow blows back onto my face and freezes into my beard mixing with snotcicles from my running nose. 

There is a lot of strategy involved in planning where to throw the snow.  If you throw snow upwind it will just blow back in your face, and that is not only unpleasant but ineffective.   So every pass I have to adjust various aspects of the thrower to put the snow where I want it to go by turning the chute and selecting the appropriate gear and tilt angle for the chute.  For instance if there are only a few inches of snow on the ground I can cruise along in third or fourth gear.  But when the snow is at or above the height of the hopper, I slow to a crawl in first gear leaving the auger running and stopping and starting forward momentum using the right hand clutch handle.  I can hear the engine straining when it is chewing down on too much snow and that is a sign to either drop to a lower gear or pause to let the thrower catch up and chew through the snow in its hopper.

It takes me anywhere between one and two hours to clear our property depending on how much snow has landed.  I need to clear our driveway which is relatively small, but also a path between the house and my workshop.  Another path around to the back of the house so we can get to the woodpile from the rear basement door.  And another path around my workshop to make it easier to access my woodpile, and to clean snow off my collectors and solar panels.  All in all this amounts to hundreds of feet and tons of snow that need to be moved.

I have to admit that it is quite a bit of fun as this is the closest I will get to using heavy earth moving equipment.   Almost every boy/man idealizes having a job using big earth moving equipment I think.   For those of you in southern climates, I hope you have enjoyed this vicarious ride along with me and my snow thrower.

http://nca2014.globalchange.gov/highlights/report-findings/extreme-weather

The jet stream is being severely affected by changes in the Arctic.  The result is that there is an "Atlantic conveyor" that draws moisture from the Gulf of Mexico and blows it up along the East Coast.  For the last several weeks, we have had a series of heavy snowstorms arriving a few days apart.   Any one of these storms by itself would not be an anomaly, but this consistent sequence of heavy storms is a clear indication of climate change. 

Friday, February 13, 2015

Cli-Fi and climate awareness

I have been reading science fiction since I was a kid in the 1960s.  Currently, I read two or three SF books every month on my Kindle and sometimes go back and re-read books that I had read in print years ago.  I particularly enjoy science fiction that takes an existing facet of our world or culture and extrapolates it into the future.  Some SF authors work in the new genre known as "climate fiction" (or Cli-Fi) in which the story focuses on climate change in the near future.
Several years ago I read Kim Stanley Robinson's science in the Capital trilogy that focus on abrupt climate change set in the present day.  Kim is one of Science Fiction's best authors and also one of my personal favorites.  His books tend to be long and wordy and filled with relevant and apparently well researched science, while his characters remain engaging throughout.  Beginning with "Fourty Signs of Rain", this trilogy left a profound impact on me and permanently changed the way I see the world.  Since then I have studied climatology and climate change and have come to believe that what he has portrayed in these books is quite likely to occur this century. 

If you enjoy reading fiction, or science fiction as a way to gain insights into our contemporary culture as I do, you will find these books a good read.  

http://www.amazon.com/2312-Kim-Stanley-Robinson-ebook/dp/B004RD8544/ref=sr_1_4?s=digital-text&ie=UTF8&qid=1423862911&sr=1-4&keywords=Kim+Stanley+Robinson
I recently read John Barnes book "Mother of Storms" which sets a much more dramatic scenario in some ways than Robinson's books.  John is one of Science Fiction's "killer B's" that include other great authors such as Greg Benford, David Brin and Greg Bear - all favorites of mine.  The abrupt climate change scenario in this book is based on cutting-edge science and proposes the idea that enormous methane releases from clathrates buried under the Arctic could trigger a jump in global temperature which in turn could create massive hurricanes on a scale never seen before.  Given that this book was first published in July 1994 (I read a re-print from 2102), it reads as amazingly prescient even today given what we know about the methane trapped under the oceans in the Arctic.  This is known as the methane gun hypothesis in climate studies and is an issue of grave concern to climate scientists as a potential trigger for extremely abrupt climate change.  We are already beginning to see the impacts of increased ocean and air temperatures on moisture uptake into the atmosphere in the form of increasing numbers of severe rain and snowfall events.

Barnes's book follows several intriguing characters through the mayhem that ensues as a giant hurricane and its spawn devastates much of the planet.  This is no made-for-TV style novel, but one grounded deeply in reality and science.  The only thing I found uncomfortable was his penchant for portraying sexual deviance and torture, along with horrifying ways to die.  This is no book for the faint of heart, and portrays a dystopian future humanity.  Nonetheless it is a vivid and engaging read that puts the potential for abrupt climate change into a clear context of a near future human world scenario.

I am currently reading Kim Stanley Robinson's book "2312".  As the title would suggest it is set in the future long after the Earth has been impacted by climate change.  Humanity has become interplanetary and inhabits most of the moons and planets in the solar system.  His characters are deeply engaging and the story is rich and filled with wonderful science fiction technology insights and obscure cultural references.  This is yet another book which indirectly addresses climate change as a possible future for humanity and I highly recommend it as a good read even though I'm only about one third of the way through the book.

If you enjoy reading fiction, or science fiction and want to learn more about climate change, these books create an entertaining and yet factually based way of absorbing knowledge about this crisis that humanity will certainly be confronting in the foreseeable future.


Tuesday, February 3, 2015

Bye-bye beaches

Frenchman's Bay, Maine - looking northeast
Do you have a favorite ocean beach?  Well pretty soon it will be a memory only.

My extended family has a cabin on Frenchman’s Bay in “Downeast Maine”.  It is a stone’s throw from the beach with a spectacular view of the bay.  In the center of the image below is Mt. Cadillac (the hill in the center) which is the easternmost point of the continental United States where the sun first strikes the continent.


Beach on Frenchman's Bay, Maine looking southeast toward Bar Harbor


This is my sanctuary, the place where I go to rejuvenate and shut out the world for a while.  As beaches go it is not exactly your tropical island paradise, but the rocks are endlessly interesting and the tide moves so quickly you can actually watch it as it changes over 10 feet two times per day.  Watching the tide rising inexorably is a portent of things to come.

I am sharing this as a reminder to everyone who has a favorite beach somewhere in the world that most of these beaches will be permanently underwater before the end of the century.

Climatologists estimates of how high the ocean level will rise by 2100 continue to escalate, at present they are saying 6 to 13 feet but I suspect it may be more by the time they factor in all of the other feedbacks.  Take a moment to fully process this concept - the beaches will be gone, period.  This means that within your lifetime you will lose what cherished memories you have because we have so thoroughly screwed up the planet that the oceans will inevitably rise and take away many of our favorite places.

If this is not enough of a wake-up call, I do not know what is.

edited and re-printed from my earlier June 10,2014 post

Sunday, January 25, 2015

Idling vehicles - bad for all concerned

At this time of year I occasionally notice vehicles left idling in parking lots, sometimes they are completely unattended.  While this practice has been common in the winter in northern states for a long time, it is a really bad idea for a lot of reasons.   From a sustainability standpoint reducing wasted gasoline and CO2 emissions is a no-brainer. Leaving vehicles idling is an old habit that is irrelevant to modern engines that do not need to be kept warm.  By one estimate nearly 2% of the nations CO2 emissions come from vehicles that are not moving.  According to a study by the Argonne National Laboratory in 2009 drivers actually averaged 16 minutes a day of idling.

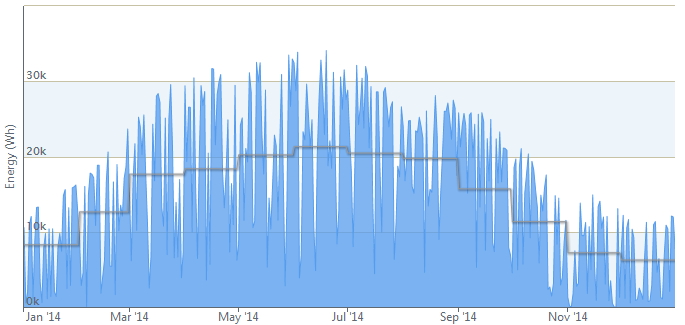
An idling vehicle emits 20 times more pollution than when it is moving at 30 mph.  These emissions are particularly problematic for children who are more sensitive to air pollution since their defense mechanisms are not yet fully developed.  This is why many school zones have declared their parking areas "No Idling Zones".  Here in Maine temperatures remain below freezing on average for most of the winter, here is a chart from my weather station spanning February 2013 through April 2014:
While it is understandable to want to warm up a vehicle for a minute or so before you get in it, the vehicle itself does not require it.  When an engine idles it is not running at its optimum operating temperature and condition, resulting in incomplete combustion of gasoline that can leave fuel residues in the engine which can shorten its life.  Modern fuel injection vehicles can and should be driven after only warming up for a few seconds since that warms up the catalytic converter and other parts of the car more rapidly.  Here is a helpful reference about vehicle idling and the issues surrounding it.

With the advent of hybrid vehicles, needless idling is being reduced because almost all hybrid vehicles shut off their gasoline engines when they are at a standstill.  Vehicle manufacturers are also developing auto stop features for regular gasoline engines, and many vehicles in Europe now have that feature.  My wife and I have owned hybrid vehicles since 2001 and are very familiar with engines that automatically stop when the vehicle stops, although people new to this feature find it disconcerting at first.  The engine restarts instantly when you put it in gear or move your foot down on the accelerator.  This is one of the schemes that hybrid vehicles use to reduce their carbon emissions and obtain low emission ratings.
My 2012 Chevy Volt has a remote start feature that allows me to warm up the vehicle for 10 minutes from over 100 feet away by clicking the keyfob.  This wonderfully convenient feature allows me to step into a warm vehicle in the dead of winter.  Since I leave the vehicle plugged in, it will use energy from the (240V Level II) charging station to warm the battery unless it is below 20°F in which case it will run the four-cylinder 1.4 L engine/generator for a while in order to generate enough waste heat to warm up the battery to a safe level.  Electric vehicle batteries can be damaged if they draw power when they are below freezing, so the vehicle needs to protect itself in this instance.  Sometimes in very cold weather if I am driving in fully electric mode, the engine will start and show a display on the dashboard that says: "Engine running due to temperature".  GM engineers considered this an optimal trade-off to protect the very expensive battery bank.

You may believe that turning a car on and off repeatedly wears out the battery and wears out the starter, but it's not true. Today, nearly every passenger vehicle engine uses electronic ignition so you do not need to crank the engine for multiple seconds to start it like the old carburetor engines.  You may not have noticed it but modern vehicles very rarely need to be jump started and keeping jumper cables in the trunk is a thing of the past.

To quote from the above-mentioned reference:
The city of Aspen, Colorado, launched a program called Idling Isn’t Cool, which targets people who let their cars idle to warm them up in cold weather or while running errands. Environmental health specialists walk through town and place small, laminated placards featuring an image of the earth sweating from heat on windshields of offenders. The placard reads, “Turning off your engine when you are not driving is one of the easiest things you can do to lessen your contribution to global warming.” It goes on to explain that 30 seconds of idling is ample time to get engine oil circulating. It also cites the city ordinance that makes it illegal to idle an engine for 5 minutes or more and provides a link to calculate personal carbon emissions, www.aspenglobalwarming.com/calculate.cfm.
Not idling your vehicle is a simple behavior change similar to turning lights off when you leave a room.  Both things will save you money and improve the quality of life on planet Earth for future generations.

Saturday, January 24, 2015

Staying warm with interior storm windows

Small interior storm
window installed
Maine, which has the oldest housing stock of any state in the US has a lot of leaky old buildings heated with oil boilers.  Needless to say these buildings are expensive to heat and waste a great deal of fossil fuel .

Several years ago my friend Topher came up with a simple design for a double pane interior storm window that doubles or triples the insulation value of windows while also preventing all air movement through the window.  Through the auspices of our group called the Midcoast Green Collaborative we set up workshops throughout the state to teach people how to make these very simple windows.  Since then we estimate more than 10,000 of them have been deployed around the state and many more in the world at large.

They are constructed from a 1 x 2 wood frame with heat shrink plastic film affixed to an inner and outer surface to create a double pane window.  Highly compressible weatherstrip foam tape is adhered to the outer edge so that when the window is inserted into the window frame a complete seal is created.  Each trapped air layer has an approximate R-value of 1.  If you assume a single pane window which has an R-value of 1, by inserting an interior storm window you are trapping 2 additional air pockets resulting in an R-value of 3.  This dramatically reduces the heat loss through exterior windows.  In most homes in northern cold climates these windows pay for themselves in the first heating season.

The cost to build these interior storm windows is approximately a $1.25 per square foot.  This means that they can be constructed for a cost of $15-$20 per window.  Generally they take two people 30 to 40 minutes each to build and do not require any significant skills or special tools.

If you live in a cold climate and want to reduce your heating bills these interior storm windows represent an extremely cost effective way to do that.

Resources:

Very detailed assembly instructions on my webpage


Midcoast Green Collaborative webpage
Basic two-page instruction sheets (pdf format)
Thermal study of a window with interior storms added

Instructions are also available in Charlie wings excellent book: "The Visual Handbook of Energy Conservation".   Here is my review of the book.


Topher's website

Sunday, January 18, 2015

Negawatts

Do you know what a Negawatt is?  Negawatt power is a theoretical unit of power representing an amount of energy (measured in Watts) saved. It is basically the opposite of a Watt, or energy saved through energy efficiency.  Say you replace a classic 100 W incandescent light bulb with a 10 W LED lamp, every time you turn it on you are producing 90 Negawatts.  As Amory Lovins of the Rocky Mountain Institute (who coined the term) has said "The cheapest Watt is the one that's never created."  He considers the concept of conservation "a change in behavior based on the attitude 'Do Less to Use Less."

An easy way to create a Negawatt is to turn off the light when you leave the room, you would be surprised how quickly this can add up by simply changing your behavior which costs you nothing.

While this concept is not normally applied to solar energy produced, I sat down and looked at the numbers for my solar energy array to see how much energy I am saving.  Below is a chart showing the actual energy produced by my solar array for the year of 2014.
The gray line represents the average monthly estimated power which totals 5.45 MWh for the year.  My 31 panel 5.7KW solar array produced more power than estimated which is typical for Enphase micro inverters, so I actually generated 5.7 MWh.  In my mind these are also Negawatts.  In terms of dollars, my utility charges 13.8 cents per kilowatt hour, so this means that I have saved $786.60 for the year on my electric bill.  If I were still paying off the loan on my solar array at a low interest rate, this would represent almost half the annual loan payment.  Since I paid off the loan thanks to an inheritance from my Dad, this enhances the "Negabucks" for me.

Of course there is less value in installing a solar array if you have not already significantly increased the efficiency of the electrical usage in your home.  When we purchased our newly constructed home in 2001, the light fixtures all had 100 W incandescent lamps installed in them.  The first thing we did was replace them with CFL's that used only around 13-15 W.  I think we replaced around 12 lamps, and since then we replaced those with more efficient LED lamps at 7-9 W.  (Here is a handy chart comparing light bulb types and costs).  By reducing our load, we reduced the size of the expensive solar array significantly.  By the way, we disposed of the old 100 W incandescent lights by shooting them with my pellet rifle!

If we assume that each 100 W lamp is used an average of 4 hours/day, then it would use approximately 146 kWh/year, so all 12 lamps would use 1752 kWh/year.  By replacing them with 7 W LED lamps they would use approximately 122 kWh/year - a Negawatt rating of over 1629 kWh/year.  At our electric rates that adds up to a Negawatt savings of $224 per year.  These kinds of numbers make the concept quite real and tangible.

Saturday, January 17, 2015

Berkeley Study: Solar Adds $15,000+ to Average Home Value

This article is re-printed from the the January 2015 newsletter from Re-Vision Energy, a solar energy installer based in Portland Maine.

Many prior studies have suggested that solar adds to a home's value, but they have often been limited in time range and geographic scope. Now, a team of scientists from Berkeley Labs, in partnership with universities and appraisers, has found that solar unequivocally improves the value of a home, on average by an amount of $15,000.

The data is based on analysis of "almost 22,000 sales of homes, almost 4,000 of which contained PV systems in eight states from 2002 to 2013—producing the most authoritative estimates to date of price premiums for U.S. homes with PV systems."

Some key findings:
  •    There was no statistically significant difference in the solar premium between new and existing homes.
  •    While not conclusive, the study suggests that solar, regardless of size, adds a special appeal to home buyers (the 'green cachet'), meaning that smaller systems (2-4kw) may have a disproportionately high premium relative to their actual energy production.
  •    Solar value is "statistically similar to [market premium approaches] estimated using the income and cost approaches, methods familiar to appraisers." (http://emp.lbl.gov/news/berkeley-lab-illuminates) - meaning that appraisers should be able to integrate solar valuation into already understood methods of assessing other premium features of a home.
  •    The study did find that the premium for a PV system depreciated faster than the system's output - i.e. a 1 year old system might fetch a $6/watt premium whereas an 8 year old system might fetch a $3/watt premium (even though the system is producing almost 100% of the power in year 8 as it was in year 1). On the other hand, a PV system in year 8 would have by that time repaid nearly all of the original investment to its owner, so any premium is a great deal!

So the good news for solar customers?
  1. You can feel confident that your solar investment will pay for itself, either over the life of the system as you live in your home, or by fetching a premium price should you need to sell your home.
     
  2. Studies like this make banks increasingly comfortable with solar, meaning it should continue to get easier to use a home equity loan or home equity line of credit product to invest in solar.
For the data-hounds, there is more information available online:
Report PDF2.17 MB
Full Report Fact Sheet PDF259.78 KB
New Homes Fact Sheet PDF236.39 KB

This article is re-printed from the the January 2015 newsletter from Re-Vision Energy, a solar energy installer based in Portland Maine.