Translate

Sunday, March 28, 2021

DIY install of a Mr Cool heat pump

In March 2021 I received a government stimulus payment of $1400 as part of the Covid-19 recovery.  So I decided to do my civic duty and stimulate the economy by purchasing a DIY Mr. Cool heat pump.  And of course, I am on a mission to reduce my carbon footprint.  I got a very good price from Lowe's of under $1600 for this 240V unit which is rated at 23,000 BTU or 20 SEER for cooling and  25000 BTU for heating (Model: DIY-24-HP-C-230B).  It is rated for 1000 ft.² so it will be sufficient to heat the ground floor of my home which is roughly 27 X 27ft.  It is a split system meaning that it has a condenser outside and an air handler inside connected by wiring and plumbing and can do both air conditioning and heating.  Split heat pumps are known to be very efficient - typically well over 300% efficient, meaning 1000 W of electrical energy gets you over 3000 W of heating or cooling energy.  Yes I know, this sounds like magic, but it's actually just basic physics.

By purchasing the DIY installed unit I am saving over $2000 in markups and installation costs.  Several years ago I got prices from a couple of different local installers that were around $4500.  I did have to buy almost $200 worth of additional parts to complete the installation.  This includes the outside mounting bracket, electrical wire, circuit breaker, outdoor disconnect box, outdoor conduit and a plastic line set cover.  So all in, I'm spending a little over $1800.  It took me many hours of research to identify and select the best prices for all of these components but it was worth it, and I am a geek so this is what I do!

I spent about seven hours doing the actual installation, and if my house had not been built in an unusual way, it would've been a lot easier and faster.  I watched YouTube videos of other people doing installations and some people were able to do it in 4 hours or less. 

Installing line set and mounting bracket

The two biggest challenges were drilling a 3.5" diameter hole through the wall for the plumbing line set, and installing the mounting bracket for the condenser outside.  That hole had to go through 3 2X6 studs and took over an hour to open up!

Here's what the condenser looks like mounted outside my basement door:

and the air handler inside with the remote control:

I made a time lapse video of the installation with subtitles explaining each step:

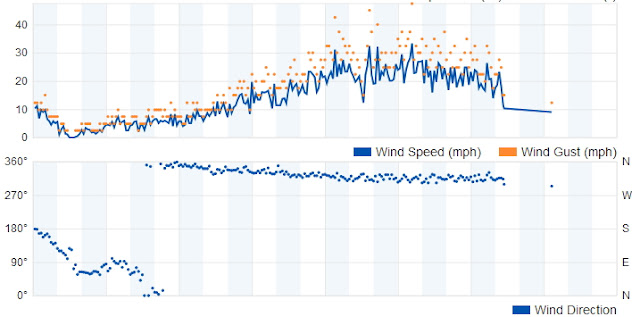
From studying the energy consumption, I am very disappointed to see that the standby energy use ranges from 37 to 57 Watts.  According to a tech support guy, they need to leave the fan inside running at low speed to continuously sample the temperature for the thermostat.  This is grossly inefficient and there seems to be no way to disable that. 

Since my home, business, and vehicle are largely powered by my self installed solar array, the electricity for this heat pump will come mostly from the sun.  I will keep the Rinnai propane heater in place because heat pumps lose efficiency when temperatures drop below 5°F as they do often here in Maine in winter.  I also use a large wood stove in the basement whenever outside temperatures are below 20°F.  By using up to a cord of locally sourced firewood, I am also reducing my energy needs with a renewable resource.

This Mr. Cool heat pump also comes with a smart phone app and can link to my Amazon echo units so that I can control it by voice by asking Alexa to change the temperature setting etc.  The app lets me set up a schedule of temperatures and also review the history of usage by hours per day.  It has a geo-fencing option that you can use to turn the heat down when you leave home, but since I'm around all the time, I won't be using that.  It also shows a timeline of when settings were changed, all of this really appeals to the geek in me!

Update:  After a few months, I learned that it is best to set a comfortable temperature and leave it there in the winter.  This is more efficient because the system does not have to work hard to make up the difference when the thermostat is set higher.  Although in the summer which is mild here in Maine - I just turn the unit on and off as needed for air conditioning.  These units are MUCH more efficient in AC mode and can cool the room rapidly.

Friday, January 22, 2021

Inconvenient trees


I took this photo of my workshop on January 15 to show the way that the trees on the windrow on the south side of my property have grown to shade my solar collectors and panels.  This windrow forms the border between my property and my neighbors.  When I first moved here in 2001, the trees were only 20 feet or so high, now they are nearly double that and in the dead of winter here in Maine when the sun angle is very low (latitude 43) these trees are becoming more and more obnoxious.  So I asked my neighbor how he would feel about my topping them and he was fine with it.  He had just signed up for getting his electricity from a solar farm and bought a Chevy Bolt electric vehicle, so he is fully on board with renewable energy.

So I put a bow saw over my shoulder and climbed up the trees and aggressively trimmed back the branches that were most actively shading the four large solar collectors that I used to heat the building in the winter.  I was able to gain back about an hour of sun in the afternoon which makes a big difference in offsetting propane needed to heat my workshop building.


This photo was taken after my first pass at topping the trees on the left.  It was taken at around 1:30 PM.  I have two other trees to cut, but I will need help from one of my other neighbors to accomplish those since there is some strategy involved.

Below are charts showing the output from my solar electric panels before and after trimming the trees as shown above.  you can see that the trees had been taking a bite out of my beautiful parabola on clear sunny days!  Definitely some improvement here!


I noticed on my community Facebook group that local people with goats were asking for Christmas trees because goats like to eat them, so I offered the cut branches and a couple of people came and picked them up! 

I had two other options; pile them in the backwoods and let them decompose, or burn them.  But both of these options would release carbon into the atmosphere.  I think it is more environmentally responsible to let goats have them don't you?

Monday, October 26, 2020

Why I buy organic food

 I recently mentioned to a friend that I only buy organic milk.  As a Mainer who is naturally frugal, he didn't understand why I would spend more money for it.  I explained that to me it just tastes better, but I am also voting with my dollars to support organic agriculture.  I also buy certified organic produce both in the supermarket and from local farmers at the farmers market when I can.

I also use the organic milk to make my own yogurt using a small inexpensive yogurt maker.  After finding that Stonyfield is my favorite brand, I simply use that as a starter to make my own which is less expensive and tastes just as good since I am starting from organic milk.  I buy a quart of Stonyfield yogurt a couple of times a year to restart the process.

The O organics brand at the Shaws supermarkets here in Maine is affordable, and I am pleased that this company supports organic products and local farmers.


Saturday, August 29, 2020

243 MPG vehicle - my2017 Chevy Volt!


I have had my 2017 Volt since October 2016 and I just checked my mileage history thanks to VoltStats! (no longer active).  Here's a lifetime chart of electric vs gas driving:

As you can see I have driven over 36000 miles total and only about 5300 miles using gas at about 42MPG.  I drive mostly locally and at low speeds on my rural Maine roads so I stay within the nominal 55 mile electric range 85% of the time.  The 4 cylinder "range extender" gas engine kicks in to power a 50kW generator when the battery gets low and this provides the power to keep the electric drive train going and maintain a minimum battery level.

Since I charge my Volt from my solar panels, it costs almost nothing to drive.  I think I bought about 30 gallons of gas last year - seriously. 

GM have sold over 200,000 of these amazing vehicles, but stopped producing them in March 2020 sadly.  I'm keeping mine indefinitely because it's an amazing vehicle that fits my needs perfectly.  I have heard that some owners already have over 100K miles on theirs with no loss of range and minimal maintenance costs like replacing tires.

They turn up used as off-lease vehicles for a very reasonable $15-17K so that are still a bargain considering the very low operating costs.

I love showing off how FAST this car is, in sport mode it launches like a rocket and burns rubber like a Camaro.  But practically it's nice to have passing power on Maine's 2-lane blacktops.

I also like the roomy hatchback where I can haul all kinds of tools and equipment like my metal detecting stuff (www.guydigsitup.com).  I can fit 8ft. lumber INSIDE the car with the rear seats down!

By the time I need a new vehicle, I hope that most of the ones being sold will be fully electric.  We have to stop the runaway train of the climate crisis before it's too late!  I'm doing my part - how about you?


Saturday, June 6, 2020

Upgrading from 100W halogen to 17W LED celiling light fixture

In my guest room I have had a 100W dim-able halogen ceiling light since 2001.  It creates a nice ambience when dimmed down and is bright enough for a bedroom, but it's an energy hog.  So I found an affordable replacement at Lowe's made by Progress Lighting that uses LED light and draws a max of 17W.  It is also fully dim-able - a relatively new feature for LED lighting.

Here's the old vs new inside:

Halogen light
Halogen light
LED light
LED light


Here are the specs:
Ideally this lamp will last longer than I will!

Here's the packaging:
It's not the most stylish light, but it reads as brighter than the halogen and the color is a pleasant warm tone (3000K).  They had more modern minimalist styled lights at Lowe's, but they were outside my budget.

Looking closer at the lamp inside when it is dimmed down to minimum shows all the tiny LEDs:

Overall I'm impressed with this energy saver - except for one thing.  They used non-recyclable Styrofoam in the packaging.  Many other lamps come packed in cardboard or other recyclable paper product.

I am particularly pleased that this uses less than one-fifth of the energy of the old halogen lamp. My new roommate is likely to use this lamp a lot so it will definitely impact my energy budget and benefits the planet.


Sunday, May 10, 2020

My grid-tied solar power system and back up


My solar power system is grid intertied.  This means that I have no battery backup and the solar inverters shut down to prevent back feeding power into the grid in an outage.  This could harm line workers as they restore power and is a federally mandated safety system built into all grid connected solar equipment.

So I have 2 meters.  One that records incoming energy from the utility (the use meter), and the other records surplus energy that I export to the grid (generation).  My solar power offsets my usage, and in the summer and fall I generate more than I use so the utility credits me for the power I put into the grid.  The credits accumulate and I use them up in the late fall to cover a month or 2 of bills.

A lot of people assume that because I have solar I have power during an outage.  I don't.  I had 2 options when I built my system in 2009 - battery backup or an automatic standby generator.  The cost and maintenance of a battery bank would be prohibitive and it would not work well with the micro-inverters that I used.  Back then the only option was lead-acid batteries that were either flooded (filled with liquid acid) that require constant maintenance, or more expensive sealed batteries know as AGM (absorbed glass mat) batteries.  Nowadays lithium batteries are more common - like the Tesla Powerwall.  But that is also pricey and does not provide as much storage as I would like.

So I elected to install a Generac Guardian automatic backup generator powered by propane.  This unit starts within 15 seconds of an outage and is pretty reliable, as long as I do basic maintenance.  I already had a propane backup boiler for my solar heating system, so I had a propane storage tank right near my utility room.  I got mine from Home Depot for $2500 and installed it myself.  It cost less than half the cost of a modest battery bank that would be sufficient for my needs.  With a full tank (actually 2 tanks) of propane I can run for over 2 weeks on the generator and often need it for days at a time when we get big winter storms.  The generator does not power everything on my property, just the essential loads, so it can't charge my electric car and I can't run my table saw or wood lathe - both are big 240V machines!

I installed an hour meter for my generator in a box with 2 lights that indicate where my power is coming from and use this to record how long each outage is.

This last winter was brutal with 11 outages ranging from an hour to over 2 days.  We had a lot of hard wind storms with gusts topping out at over 45MPH as recorded on my weather station.  Yesterday (May 9, 2020) was a typical windy day that knocked power out for 10.5 hours.  You can see that the wind gusts went off the chart at 50MPH!  You can see where the power dropped out where the blue line goes flat at around 7:30pm.https://www.wunderground.com/dashboard/pws/KMEWOOLW2/graph/2020-05-9/2020-05-9/daily
 Click on the image to see my live weather station.

Here's a list showing generator run times per outage we had over the winter and spring:
 
So clearly it's a Faustian bargain for me.  Most of the time I'm using free and clean energy from the sun to power my home, workshop and Chevy Volt.  But then I have to deal with dirty, expensive propane when the utility power drops out.  I still think it's more cost effective than batteries.  But someday I'd love to install more solar and battery power to go fully off the grid.


UV Germicidal Sanitizing lamps and scams - the science and technology

UVC Germicidal Lamps - a tutorial

During the Covid-19 pandemic a large number of sellers on the internet are touting "UV Germicidal Sanitizing" lamp products.  Most of them are fake and do not produce useful UV light.  In the first week of May 2020 I noticed that Amazon has clamped down on these scam products and removed them, but they remain widely available on eBay and other sites.

So I though I would offer some guidance on how to distinguish real from fake products.  I'll start with the science behind UV, then talk about technologies that produce UV (ultraviolet) light and finally talk about what types of products are real, practical and usable.  Be advised that genuine germicidal UV lights produce dangerous light that can harm your eyes, burn your skin and product harmful amounts of ozone (O3).

ULTRAVIOLET LIGHT
UV light is broken into 3 categories, so first lets put it into context.
UV light is beyond the human visible spectrum - although parts are visible.  For instance long wave "black lights" are used to light posters and fluorescent minerals are UVA and are perceived as deep purple.  UVB light is used in bug lights and is seen as a pale lilac/white color.  These 2 types are commonly available in small fluorescent tubes and do not produce harmful UV although prolonged exposure to UVB (like those use in tanning parlors) can give you sunburn.  UVA penetrates glass and clear plastic while B and C do not.

UVC however is much more hazardous, but fortunately the ozone layer in our atmosphere blocks most of it.  It is UVC that has the germicidal and sterilizing properties.  This wavelength from 100 nanometers (nm) to 280nm breaks the molecular bonds in DNA preventing viruses and microorganisms from replicating.  UVC is harmful to humans and can give you skin burns quite quickly and if you look at this type of light your eyes can be harmed.  Welding arcs produce UV that welders sometimes see without safety goggles and the result is known as "arc burn".  Basically your eyes will feel like there is sand in them for hours and it can be quite painful.

UVC produces what is called ionizing radiation that directly disrupts the molecular bonds of oxygen (O2) and the free molecules join up to create ozone (O3 or 3 oxygen atoms) in the surrounding air.  Ozone is that "fresh air" smell you get from lightning in a thunder storm.  The lightning itself produces a lot of ozone.  In moderate amounts ozone is not bad for you, but too much will harm or inflame your lungs.

UV LIGHT TECHNOLOGY
There are basically 2 ways to produce UV light, gas discharge tubes (like fluorescent tubes) - and LEDs (Light Emitting Diodes).  Here's a typical UVC tube:
It is made from quartz glass and filled with a low pressure gas such as argon and a tiny amount of mercury.  It is the incandescent mercury vapor that produces the UVC light when high voltage is applied to the tube.  This image represents what you see - a pale light blue glow. The glass must be quartz because regular glass or plastic will block up to 90% of UV light.  

The other way to make UV light is with LEDs these are solid state devices that can produce UVA (black light) and UVC.  Black light LEDs are used in discos and you see CSI techs on TV waving them around to detect blood etc.  But UVC LEDs are very expensive to make.  They typically cost from $3 to $150 each!  Here's what they look like:

This component is about 1/4" (5mm) square.  They are made from metal or ceramic with a quartz glass window.  They are quite efficient electrically so some battery powered UVC products are available that use these LEDs.  But here is where the scam comes in.  There are also a lot of LEDs that create light that has a strong white/blue cast that looks like UV but isn't.  Those parts look like this:
As you can see this is made from white plastic which - if it did produce UVC - would degrade quickly.  Not to mention that the plastic window would block most of the UVC light.

REAL vs FAKE GERMICIDAL LAMPS
Lets start with the fake products.  Here are some pictures of various ones that I found on the web:


As you can see these are constructed with dozens of white plastic LEDs that cannot be UVC emitting devices.  Some do emit UVA "black light" however. One give-away is that these products retail for under $50.  If they used genuine UVC emitting LEDs they would cost HUNDREDS of dollars!

And there are small battery powered "UV sanitizing" wands too:
In these pictures they have colored the image to make it look like the light is purple when in fact it looks white with a blue cast.  (Although some may be using inexpensive "black light" purple LEDs that produce UVA light).  Many of these fake products will lure you in with the bold keywords of: "Germicidal", "Sanitizing", and most egregious: "UVC".  They are flat out lying!  While there may be one or two products that do use genuine UVC LEDs, I would generally advise against risking a purchase unless they sell for well over $100.  But the best option is to get the real deal which are actually quite affordable.

GENUINE GERMICIDAL LAMPS
Products that do produce UVC will look like this:

The one on the right correctly states "with ozone".   These lamps do not produce dangerous amounts of ozone unless used in a small space. There are also portable UVC sterilizing wands like these:
If you look closely, you can see the quartz glass tube inside - as opposed to the LED dots in the wands above.  These units are fine for sterilizing small items like breathing masks or light switches, and can accomplish good results if used for several minutes.

Larger, more powerful tubes are wall powered and are more effective and do produce the distinct odor of ozone when operating.  Here's a good example of an 11 Watt lamp:
This type of lamp is encased in a quartz glass tube and can be rated up to 30 Watts.  Some however use a regular glass tube that blocks the ionizing radiation that produces ozone.  Some some will feature "ionizing" and some will say "non-ionizing" if they are ethical.

Hospitals use much larger UVC lamps in operating rooms and to sterilize patient rooms and they need to air out the room to remove excess ozone before it can be used after being sterilized.


There are no clear-cut guidelines for use of UVC lights but generally speaking using small (under 20W) units for several minutes to sterilize small items should work.  If you want to sterilize a room of more than 100 square feet you would need a big lamp rated at over 30 Watts and leave it on in the the room for over an hour.

This article from NPR suggests that there really is no clear "dosage" or exposure duration.  And small lamps will not illuminate every part of an object of room


Some lamps come with timers that allow you to walk away and let them work unattended.  Some even have a start button you press, and there will be a delay before they come on so you can leave the area before it lights.  All these lamps advise that the room needs to be aired out after use to reduce exposure to unhealthy levels of ozone.

UVC HAZARDS
Be advised that UVC sterilizing lamps are dangerous and should not be left in the hands of the inexperienced or children.  If you are sterilizing a room it should be closed and locked and then aired out afterward.  NEVER look directly at these lamps with the naked eye!  The lenses in most prescription glasses do block UVC but don't trust that as a safe practice.  Never expose your skin for more than a few seconds!  Keep in mind the inverse square law that states that as your distance doubles the amount of light diminishes dramatically, so touching or looking at these lamps up close is dangerous, but is somewhat safer as you get farther from it.


If you want to shop for these lamps, try this link to get started - and just ignore anything that looks like it uses LEDs.  As of this writing (May 10, 2020) they are hard to get from US suppliers.  But Chinese suppliers will ship them by air post to arrive in 4 to 6 weeks.

I hope this is helpful and useful for those of you who may be considering the purchase of a sterilizing light.  Please leave comments if you have questions, corrections or experiences to share.


Sunday, March 22, 2020

Another M190 Microinverter failure

I was an early adopter of the first M190 microinverters made by Enphase back in 2009.  They came with a 15 year warranty that is running out in 4 years and I'm getting anxious.  These first generation units are beginning to fail often - the 8th one to fail was this week.  This is out of a total of 29 devices of that generation.  I have installed some newer ones since, and replaced the failed ones with the newer models under warranty.  Fortunately they make it easy as an installer to order a replacement via their web portal.
Latest failed microinverter as of 3/2020
This one is on the top row, so my friend and I can access it from the roof ridge and from a ladder.  It takes us less than an hour once I get the replacement part, but it's a chore that is getting old.   The price I am paying for being an enthusiastic early adopter!

8 failures so far
 For more info about my solar installation - see my very detailed blog:
http://www.arttec.net/SolarPower/index.htm


Saturday, November 30, 2019

Electric room heater failed - not repairable

This afternoon I went to turn on the electric heater I use for supplemental heat in my office when it gets really cold outside.  It didn't come on and beeped sadly and the display did not light.  I really liked this heater because it had a digital thermostat that I could set, and also a timer so it would shut off after a preset number of hours.  So I tore it apart and spend 1/2 hour testing the electronics.  I could not find the failure even though it was all quite well designed.  (As a product designer, I should know!).  So sadly I had to trash it.  I just saved a few components that I could use.


The new Lasko ceramic heater I got came packed in sustainable/recyclable materials which is a plus.  (Click here to buy one - as an Amazon Associate I earn from qualifying purchases.)  Also it is very quiet so I may move it to my bedroom where I can control it from my Nest thermostat, replacing a noisier heater.  (See the post about how I built an interface to control a room heater for my Nest here.)

I hate disposing products, but if I can't fix it - nobody can!


Monday, October 28, 2019

Filling the solar collectors for my workshop solar heating system


 NOTE! I removed this system and replaced the collectors with 6 320W solar panels that will offset the 2 heat pumps I installed myself.  See this post

 
Every fall as the temperatures start dropping down to freezing I fill the collectors for my solar heating system with antifreeze solution, and in the spring I drain them.  I don't need the heat in the spring and summer.  If the antifreeze fluid gets too hot it will cause an over pressure in the collectors and also the fluid will turn acidic and begin to corrode the copper plumbing.

I mix a 50% solution of antifreeze and water and pump it from a 5 gallon bucket into the collectors and then run the pump long enough to purge air from the system.  Air bubbles can stall the pump and that is a big problem that can cause over heating.

Each year I note when I fill and drain the system on the wall of my 80 gallon storage tank (which is a regular water heater used just as a holding tank for solar heated water).  And yes we have a 7 to 8 month heating season in Maine!


Today it is cloudy and I don't expect any sun.  My system controller (that I manufacture - click here to learn more) shows 83F at the collectors and 121F at the top of the tank.  The tank temperature is high due to the propane backup that maintains the tank at 110 to 120F.  The collectors can heat the tank up to well over 180F on a good day and that is the free solar heat that I use to warm my workshop and office.

You can see a detailed blog about the design and construction of my solar heating system here

Here's a system diagram - click here or on the image to see live performance data.